Think of a real estate video walkthrough as a digital open house, open for business 24/7. It’s a short, engaging video that takes potential buyers on a guided tour through a home, showing off its layout, unique features, and overall vibe. The goal isn't just to show the property, but to create a feeling—a genuine sense of what it's like to actually be there.
What a Video Walkthrough Truly Delivers
Still photos are great for highlighting a beautiful countertop or a custom-built bookshelf, but they can't capture the soul of a home. A real estate video walkthrough fills in the blanks. It shows how the entryway flows into the living room, how the kitchen connects to the back patio, and how natural light floods the space as you move from one room to the next. It’s about conveying an experience, not just listing features.
Picture a buyer endlessly scrolling through listings. After a while, all the photos of granite countertops and stainless steel appliances start to blur together. But a video that smoothly glides through a bright, welcoming kitchen and into an open-concept living area? That sticks. It helps people start to mentally arrange their own furniture and imagine their life unfolding there. This is how a simple listing transforms into someone’s potential new home.
More Than Just a Slideshow
It’s easy to get visual formats confused, but knowing the difference is key to building a powerful marketing strategy. Each has its own job to do.
- Photo Slideshow: This is the most basic option—just listing photos stitched together with some background music. It’s better than nothing, but it offers zero sense of movement or spatial flow.
- 3D Virtual Tour: Using special 360-degree cameras, these tours let users click around and explore a property at their own pace. They’re fantastic for deep dives but lack the curated, storytelling aspect of a video.
- Video Walkthrough: This is a guided, cinematic journey. The camera moves deliberately—panning, tilting, and gliding forward—to draw the viewer's eye to the home's best assets and tell a compelling story.
A video walkthrough isn't just a recording; it's a curated experience. It’s your chance to be the director, guiding the viewer from the front door to the backyard and building excitement every step of the way.
The Impact on Buyer Engagement
In a crowded online market, the real power of a video walkthrough is its ability to grab—and hold—attention. By giving buyers a rich, detailed preview, you’re helping them pre-qualify the property themselves. The ones who call you after watching are already picturing themselves living there.
The numbers don't lie. Industry reports consistently show that property listings with video receive an incredible 403% more inquiries than listings with just photos. Why such a massive jump? Because video gives buyers the confidence they need to take the next step and book an in-person showing. You can dig deeper into these marketing stats over on Optica Photo's blog.
Choosing Your Video Production Method
So, you're sold on creating a real estate video walkthrough for your listing. Fantastic. Now for the big question: how are you actually going to make it?
There's no single "right" answer here. The best path for you really depends on the property itself, your budget, and what you're trying to achieve with your marketing. Think of it as choosing between a custom-tailored suit, a great off-the-rack option, or a clever, budget-friendly outfit. Each one has its place.
You've got three main routes to consider. You can go all-out and hire a professional videographer for that polished, cinematic feel. You could take a more hands-on, do-it-yourself (DIY) approach by turning your listing photos into a video slideshow. Or, you can tap into modern tech and use an AI tool to generate a slick video from your photos in a matter of minutes.
The infographic below helps visualize where a video walkthrough fits into your marketing toolkit, building on the foundation of great photography.
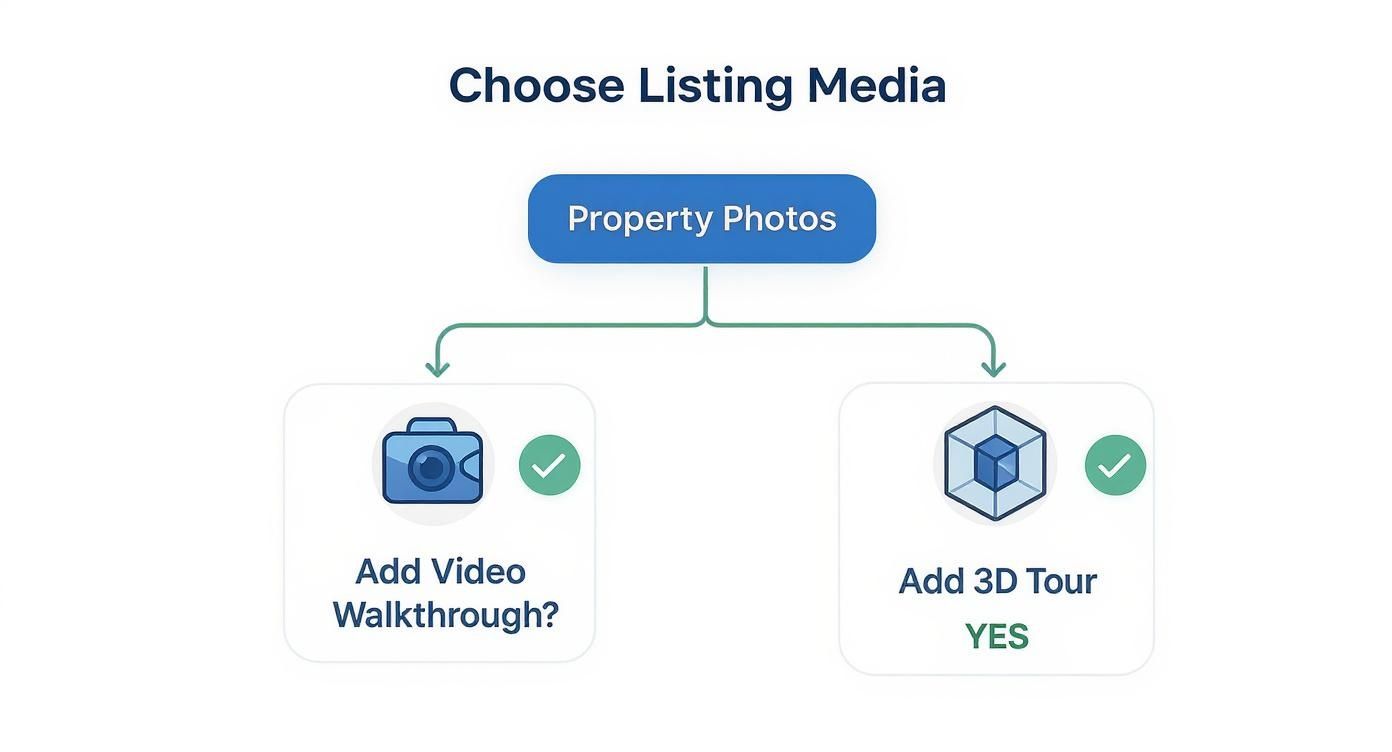
As you can see, a video walkthrough isn't a replacement for your photos; it’s an enhancement. Just like a 3D tour, it adds another layer of engagement to create a richer, more compelling online listing.
Let's break down these three methods to help you decide which one makes the most sense for your next listing.
Comparing Real Estate Video Walkthrough Production Methods
This table breaks down the key differences between professional videography, DIY photo slideshows, and AI-generated video walkthroughs to help you choose the right approach for your listing.
| Method | Best For | Estimated Cost | Turnaround Time | Pros | Cons |
|---|---|---|---|---|---|
| Professional Videographer | Luxury properties, unique architecture, high-end listings where a premium brand image is crucial. | $500 - $3,000+ | 3-10 days | Highest cinematic quality, storytelling expertise, access to pro equipment (drones, gimbals). | High cost, longest turnaround time, requires on-site coordination. |
| DIY Photo Slideshow | Budget-conscious listings, rentals, or agents who are comfortable with basic video editing. | $0 - $50 (for software) | 1-3 hours | Extremely low cost, uses existing photos, fast to create once you have a workflow. | Can look unprofessional, lacks fluid motion, doesn't convey spatial flow. |
| AI-Generated Video | The majority of residential listings (condos, townhouses, single-family homes). A great middle-ground. | $10 - $100 per video | 5-15 minutes | Fast and affordable, creates dynamic motion from static photos, professional-looking results. | Quality depends on input photos, less creative control than a human videographer. |
As you can see, the right choice really boils down to balancing quality, cost, and speed for each specific property.
Hiring a Professional Videographer
This is the top-shelf option. Think of it as commissioning a work of art for a luxury home, a one-of-a-kind architectural gem, or a major commercial property where every impression counts. A pro brings the gear—gimbals for buttery-smooth movement, drones for breathtaking aerial views, and high-end cameras that make every shot look incredible.
More importantly, they bring an eye for storytelling, lighting, and editing. The result isn't just a tour; it's a cinematic experience designed to make a property feel aspirational and unforgettable.
Best For:
- High-end luxury properties and premium listings
- Agents aiming to cultivate a top-tier brand image
- Properties with stunning features that demand cinematic treatment (like waterfront views or sprawling grounds)
The trade-offs, of course, are cost and time. A professional shoot is a significant investment, and post-production can take anywhere from a few days to over a week. In a fast-moving market, that delay can be a dealbreaker.
The DIY Photo Slideshow Approach
If budget is your number one priority, creating a video from your existing photos is the way to go. Using basic video editing software—many are free and built right into your computer or phone—you can sequence your photos, add some simple transitions, and layer on a music track.
This method works well for rental listings, standard homes, or any situation where you just need to get something more engaging than static photos online quickly and cheaply. While it doesn't have the immersive feel of a true walkthrough, a well-made slideshow is still a big step up from a simple image gallery.
The key to a good DIY video is thoughtful execution. Choose your best photos, arrange them in an order that mimics a natural tour, and keep the pacing energetic to hold the viewer's attention.
The downside is that its quality is fundamentally limited by the static images. It can't truly convey the flow and feel of a space, and if not done carefully, it can come across as amateur.
Using an AI-Powered Video Generator
A third path offers a fantastic middle ground, blending quality with affordability and speed. AI video generators, like those from AgentPulse, are built from the ground up for real estate agents. These platforms take your professional photos and use artificial intelligence to craft a dynamic, flowing video walkthrough.
It's pretty clever. The technology analyzes your photos, identifies key features, and then simulates realistic camera movements like pans, tilts, and zooms. This creates the illusion of an on-site video shoot without the crew, cost, or time.
How It Works:
- Upload: You start by uploading your high-resolution listing photos.
- Analyze: The AI builds a 3D model of the space to understand the layout.
- Generate: It then creates smooth, cinematic camera paths that guide the viewer from one area to the next.
- Customize: You can then add text overlays, pick from a library of royalty-free music, and export the final video.
This approach is a real game-changer. It’s perfect for the vast majority of listings—condos, townhouses, suburban homes—and delivers a professional-looking video in just minutes. It strikes that perfect balance, giving you the dynamic motion of a real video with the simple convenience of using the photos you already have.
Crafting a Compelling Video Walkthrough
https://www.youtube.com/embed/hUmZldt0DTg
Nailing the production method is only half the battle; the other half is all in the execution. A great real estate video walkthrough isn't just a random collection of clips. It's a story, carefully choreographed to make a buyer fall in love with the home before they even set foot inside. This is your chance to direct their gaze, build an emotional connection, and spotlight the features that make a property truly special.
This means doing more than just pointing a camera and hitting record. You need a thoughtful game plan for your shots, a good feel for the tour's pacing, and an eye for adding final layers of polish like music and captions. Whether you’re filming it yourself or giving directions to a pro, getting these creative elements right is non-negotiable.
Think of yourself as the ultimate tour guide. Your job is to lead the viewer on a journey that feels both logical and exciting, from the curb all the way to the backyard, making them feel welcome every step of the way.
Planning Your Shots for Maximum Impact
Before you even think about filming, walk through the property and map out a shot list. This is your script, your roadmap. It ensures you capture everything in a sensible order and prevents you from ending up with a jumbled, confusing final product.
The path you film should feel natural, mimicking how someone would actually explore the home. Start outside with a great curb appeal shot, then move through the front door into the entryway, and flow into the main living areas like the great room and kitchen. Save the bedrooms, bathrooms, and unique spaces—like a home office or finished basement—for the middle, and wrap it up with a strong finale in the backyard or on a scenic balcony.
- Establish the Scene: Always kick off each new room with a wide shot. This gives viewers a sense of the space and its layout right away.
- Focus on Features: After the wide shot, get in closer to highlight the key selling points. Think quartz countertops, a custom fireplace mantle, or those oversized windows with a fantastic view.
- Create Movement: Use slow, steady movements. A gentle pan across a room or a slow push-in toward a special feature feels cinematic and professional. Whatever you do, avoid jerky, fast motions that can be jarring for the viewer.
A well-planned video tells a story. The opening shot should create intrigue, the middle should showcase the lifestyle the home offers, and the ending should leave the buyer wanting to see more in person.
Setting the Right Pace and Tone
The pacing of your video is absolutely crucial for keeping people engaged. Too slow, and you'll bore them. Too fast, and it will feel rushed and overwhelming. The sweet spot is a calm, deliberate pace that feels like a relaxed stroll through the home.
You should aim for a final video length of 90 to 180 seconds. That’s usually long enough to show off the whole property without losing your audience's attention. As a rule of thumb, each shot should last between 3 to 7 seconds—just enough time for the viewer to take in what they're seeing before you move on.
Music is easily your most powerful tool for setting the tone. The right track can make a home feel warm and inviting, modern and chic, or peaceful and serene.
- Choose Wisely: Pick instrumental music that fits the style of the home. Upbeat, positive tracks are great for modern family homes, while softer, more elegant music might be a better fit for a luxury condo.
- Volume Matters: The music should be in the background, supporting the visuals, not drowning them out. Keep it low enough that it doesn't distract from the tour itself.
- Use Royalty-Free Music: Always use music from a licensed, royalty-free library. This will save you from copyright headaches when you upload your video to the MLS, YouTube, or social media.
Adding the Professional Finishing Touches
Post-production is where a good video becomes a great one. Even simple edits can seriously elevate the final product. For anyone looking to dive deeper into the technical side, our guide on real estate video editing offers more advanced tips and tricks.
One of the most important final touches is adding captions or subtitles. A massive number of social media videos are watched with the sound off, so captions ensure your message gets across no matter what. Plus, they make your content accessible to a wider audience, including people with hearing impairments.
Finally, make sure your video is optimized for every platform you plan to share it on. They all have different preferences.
| Platform | Recommended Format | Key Considerations |
|---|---|---|
| MLS & Zillow | Landscape (16:9) | Most MLS platforms prefer a standard horizontal video. Keep it professional and focused on the property. |
| Instagram & TikTok | Portrait (9:16) | Create a separate vertical cut for Reels and Stories. Keep it fast-paced and visually punchy to grab attention. |
| YouTube | Landscape (16:9) | This is the best place to host your high-quality, full-length tour. Optimize the title and description with keywords. |
By tailoring your video walkthrough for each channel, you'll get the most mileage out of your hard work, turning a simple marketing tool into a powerful lead-generation machine.
Your Production Checklist and Timeline
Putting together a great real estate video walkthrough isn't something you can just wing. Just like you wouldn't skip the staging or professional photos, a successful video starts with a solid plan, not just hitting the record button.
A simple checklist and a realistic timeline are your best friends here. They’ll keep you organized and ensure you don’t miss any crucial steps, from the first spark of an idea all the way to getting the final video online. Think of it as your roadmap to a polished video that grabs attention, brings in serious buyers, and helps you close faster.
Phase 1: Pre-Production Planning (1-3 Days)
Honestly, this is where the magic really happens. Getting this foundation right will save you a world of headaches, time, and money later on. This stage is all about strategy and getting everything ready before a camera ever comes out.
First, you need to find the property's story. What are its top three to five selling points? Is it that amazing chef’s kitchen, the breathtaking backyard view, or the cozy fireplace? These are the features that will be the stars of your video.
Next up, you have to get the house ready for its close-up. This is more than just a quick tidy.
- Deep Clean and Declutter: Every single surface should sparkle. Pack away personal items like family photos, fridge magnets, and general clutter to create a clean, inviting slate.
- Strategic Staging: Arrange furniture to make rooms feel open, spacious, and easy to navigate. Open every blind and curtain to flood the space with natural light, and don’t forget to turn on every light in the house.
- Curb Appeal: First impressions matter. A freshly mowed lawn, neatly trimmed hedges, and a welcoming front door set a fantastic tone before the viewer even steps "inside."
For more great tips on making a property shine, check out our guide to real estate photography tips—the same principles absolutely apply to video.
Key Takeaway: Pre-production is all about creating the perfect canvas. A well-prepped home doesn't just look better on camera; it sends a clear message to buyers that the property has been loved and cared for.
Phase 2: Production and Filming (1 Day)
With your plan locked in and the home looking its best, it's showtime. Whether you've hired a pro, are filming it yourself, or are using AI to create a video from photos, this is when you capture all your visuals.
If you're filming on-site, stick to your shot list. A gimbal or stabilizer is non-negotiable for getting those silky-smooth shots that look professional. If you're going the photo-based route, this is the day your photographer works their magic to capture the high-res images you'll need.
On-Site Filming Checklist:
- Follow the Path: Move through the home just like you scripted it, following a path that makes sense to a potential buyer.
- Stabilize Your Shots: Keep every movement slow and deliberate. Shaky footage is the fastest way to look unprofessional.
- Capture Key Details: After you have your wide, room-defining shots, get in close to highlight those high-value features you picked out earlier.
For an average-sized home, this whole process—from setting up your gear to the final shot—can usually be wrapped up in just a few hours.
Phase 3: Post-Production and Delivery (1-4 Days)
Once you have your raw footage or photos, it’s time to turn them into a finished video. This is where the editing, music, and final touches come in. How long this takes really depends on the path you've chosen.
| Production Method | Estimated Post-Production Time | Key Activities |
|---|---|---|
| Professional Videographer | 2-4 Business Days | Professional color grading, sound mixing, editing, and revision rounds. |
| DIY Editing | 3-6 Hours | Importing footage, trimming clips, adding music, creating text overlays, exporting. |
| AI Video Generator | 5-15 Minutes | Uploading photos, picking a music track, and generating the video almost instantly. |
For many agents, the speed and quality of an AI generator strike the perfect balance. You can get a stunning real estate video walkthrough done in less time than it takes to finish your morning coffee.
The very last step is to give the final video one more look to make sure it's perfect. Then, it's ready to share with the world. This organized workflow will help you get a fantastic, high-quality result every single time.
How to Distribute and Measure Your Video
You’ve created a stunning real estate video walkthrough. That's a huge win, but it’s only half the battle. Think of it this way: a brilliant video without an audience is like hosting an open house but forgetting to put out a single sign. To make that investment count, you need a smart plan to get it in front of as many qualified buyers as possible.
Just as important is tracking how it performs. Measuring your video’s impact isn’t about chasing vanity metrics; it’s about understanding what truly connects with buyers. This is how you prove to your clients that your marketing is generating real interest and how you connect your video directly to inquiries, showings, and a successful sale.
Maximizing Your Reach Across Key Channels
Your video deserves to be seen everywhere potential buyers are looking, and that means thinking beyond a simple MLS upload. A multi-channel approach is key to capturing attention on different platforms, each with its own audience and rules of engagement.
First, the non-negotiables: your local MLS and major portals like Zillow and Trulia. This is where the most serious buyers start their search, so your video needs to be front and center on the listing.
From there, it’s all about social media, but you have to tailor your content for each platform.
- YouTube: This is the perfect home for your full-length, high-resolution landscape video. It’s the world's second-biggest search engine, after all. A well-optimized video with a keyword-rich title and description can keep attracting organic traffic for weeks.
- Instagram and Facebook: On these platforms, you need to grab attention fast. Create a punchy, 30-60 second highlight reel formatted for vertical viewing on Reels and Stories. Pair it with an engaging caption and trending audio to stop the scroll and point viewers back to the main listing.
- LinkedIn: Don't sleep on this professional network. Sharing your video here can catch the eye of other agents who might have the perfect buyer, and it solidifies your reputation as a forward-thinking marketer.
Pro Tip: Spend a few minutes creating a captivating thumbnail. A bright, compelling image with a simple text overlay like "New Listing Tour" can make a massive difference in your click-through rate on platforms like YouTube and Facebook.
Tracking the Metrics That Actually Matter
Once your video is live, it’s time to see how it’s doing. A high view count feels great, but it doesn’t tell you the whole story. To understand the true impact of your real estate video walkthrough, you need to dig into the engagement metrics that signal genuine buyer interest.
These are the key performance indicators (KPIs) you should be watching:
- Watch Time (or Average View Duration): This shows you how long people are actually sticking around. A high watch time is a great sign that your video is compelling and holding their attention.
- Click-Through Rate (CTR): This is a big one. It measures how many people clicked a link in your video’s description—like the one sending them to the full listing page. A strong CTR is a powerful indicator of buyer intent.
- Engagement Rate: This basket of metrics includes likes, comments, and shares on social media. High engagement means your video is resonating with your audience and getting shared, expanding its reach for free.
The final, crucial step is connecting these numbers to real business results. When a new lead comes in, make a point to ask them how they found the property. Tracking how many inquiries and showing requests came directly from your video marketing is the ultimate proof of its ROI. For a deeper dive into this, check out our guide to creating compelling real estate videos.
The data makes a clear case for this approach. Listings that include a video walkthrough, especially when paired with other visuals like drone shots, can sell up to 68% faster than listings without one. For your sellers, that means less time on the market—and for you, a quicker commission. You can find more insights about these marketing stats and the impact of modern real estate visuals online.
Frequently Asked Questions About Video Walkthroughs
Even when you feel prepared, jumping into real estate video walkthroughs for the first time can feel a bit daunting. It's totally normal to have a few questions pop up, whether they're about the tech side of things or creative decisions. I've put together this little guide to give you quick, straightforward answers to the questions I hear most often from agents.
Think of this as tying up the loose ends. Getting these details sorted out will give you the confidence to move forward and make sure your video marketing is as effective as it can be, without adding a bunch of stress to your plate. Let's get right to it.
What's the Ideal Length for a Walkthrough Video?
This is probably the most common—and most important—question. You have to strike that perfect balance between showing off the property and keeping your audience hooked.
The sweet spot is usually between 90 and 180 seconds (that’s 1.5 to 3 minutes). This gives you enough time to guide viewers through the home at a comfortable pace without them getting bored and clicking away. For a home under 2,000 square feet, 90 seconds often does the trick beautifully. For larger, more luxurious properties, you might need the full three minutes to do them justice.
A great tip is to think about where you'll be posting the video. A 90-second cut is perfect for the MLS and Zillow, but you’ll want a shorter, punchier 30- to 60-second version to catch people’s attention on Instagram Reels or Facebook.
Do I Need a Bunch of Expensive Gear to Start?
Definitely not. While the pros certainly have their high-end cameras and lenses, you can get fantastic results with gear that’s surprisingly affordable. In fact, the camera on most modern smartphones is more than capable of shooting crisp, high-quality 4K video.
If you're going to invest in one thing, make it a stabilizer or gimbal. It's a handheld gadget that keeps your phone or camera perfectly steady as you move. Nothing screams "amateur" like shaky footage, and a good stabilizer is the secret weapon to getting that smooth, professional look that buyers expect. They aren't very expensive and will make a massive difference in your final product.
Should I Use a Voiceover or Just Music?
For a standard real estate video walkthrough, my advice is almost always to stick with instrumental music. Your main goal is to create an immersive feeling, letting potential buyers imagine themselves living in the home. A voiceover can sometimes feel too much like a sales pitch and can pull them out of that daydream.
That said, there are a couple of exceptions:
- Agent-Led Tours: If you're on camera personally guiding the tour, a friendly, professional voiceover is a must. It builds a personal connection.
- Luxury Properties: For a truly high-end listing, a polished voiceover can be used to point out specific architectural details, designer fixtures, or brand names that might otherwise be missed.
But for most listings, let a great music track set the mood and let the visuals do the heavy lifting.
Where Can I Find Music I'm Actually Allowed to Use?
This is a big one. Grabbing a popular song off the radio is a surefire way to get your video flagged, muted, or even taken down from sites like YouTube and Instagram for copyright infringement.
The solution is to always use music from a royalty-free music library. These are online services that offer huge catalogs of music you can legally use in your videos for a small one-time fee or a subscription. Many video editing apps and AI video tools also have their own built-in libraries of licensed music, making it even easier to find the perfect track.
Does a Video Walkthrough Replace Professional Photos?
Not a chance. Think of them as a power couple—they work best together. Professional photos and video walkthroughs serve different, but equally important, purposes.
High-quality photos are what first grab a buyer's attention as they're scrolling through hundreds of listings. They let people quickly scan the property and zoom in on specific details. The video then comes in to provide context, show how the rooms connect, and build that crucial emotional connection. To create a listing that truly stands out and attracts serious buyers, you absolutely need both.
Ready to create stunning, scroll-stopping videos without the cost or hassle of a film crew? AgentPulse uses AI to transform your existing listing photos into a dynamic real estate video walkthrough in just minutes. Elevate your marketing and attract more buyers today.
Learn more and start your first project at AgentPulse.