
In the fast-paced real estate market, your listing photos are your most powerful first impression. Potential buyers scroll through hundreds of properties online, and the images they see will determine in a matter of seconds whether they click for more details or swipe on to the next listing. High-quality, professional-looking photographs are no longer a luxury; they are a fundamental requirement for attracting serious inquiries and achieving a top-dollar sale. A blurry, poorly lit, or cluttered photo can immediately devalue a property in a buyer's mind, while a stunning, well-composed shot can create an instant emotional connection and a sense of desirability.
This guide moves beyond generic advice to provide a comprehensive collection of actionable real estate photography tips designed for immediate implementation. Whether you are a real estate agent using your smartphone, a property manager marketing a new unit, or an aspiring photographer, you will find specific, practical techniques to transform your listings. We will cover everything from essential camera settings and strategic staging to advanced composition and lighting.
You will learn how to:
- Master wide-angle lenses without distorting the space.
- Harness natural light and the "golden hour" for magazine-worthy shots.
- Implement post-processing and HDR techniques for perfectly balanced images.
- Tell a compelling story with detail shots and effective composition.
- Seamlessly convert your photo assets into dynamic, scroll-stopping listing videos.
By applying these proven strategies, you can ensure your properties stand out, capture buyer attention, and ultimately drive more showings and faster sales.
1. Use Wide-Angle Lenses (14-24mm)
One of the most essential real estate photography tips is to use a wide-angle lens. These specialized lenses, typically in the 14mm to 24mm focal length range, capture a significantly wider field of view than a standard lens. This capability allows you to showcase an entire room in a single, compelling shot, making spaces feel more open, bright, and inviting to potential buyers.
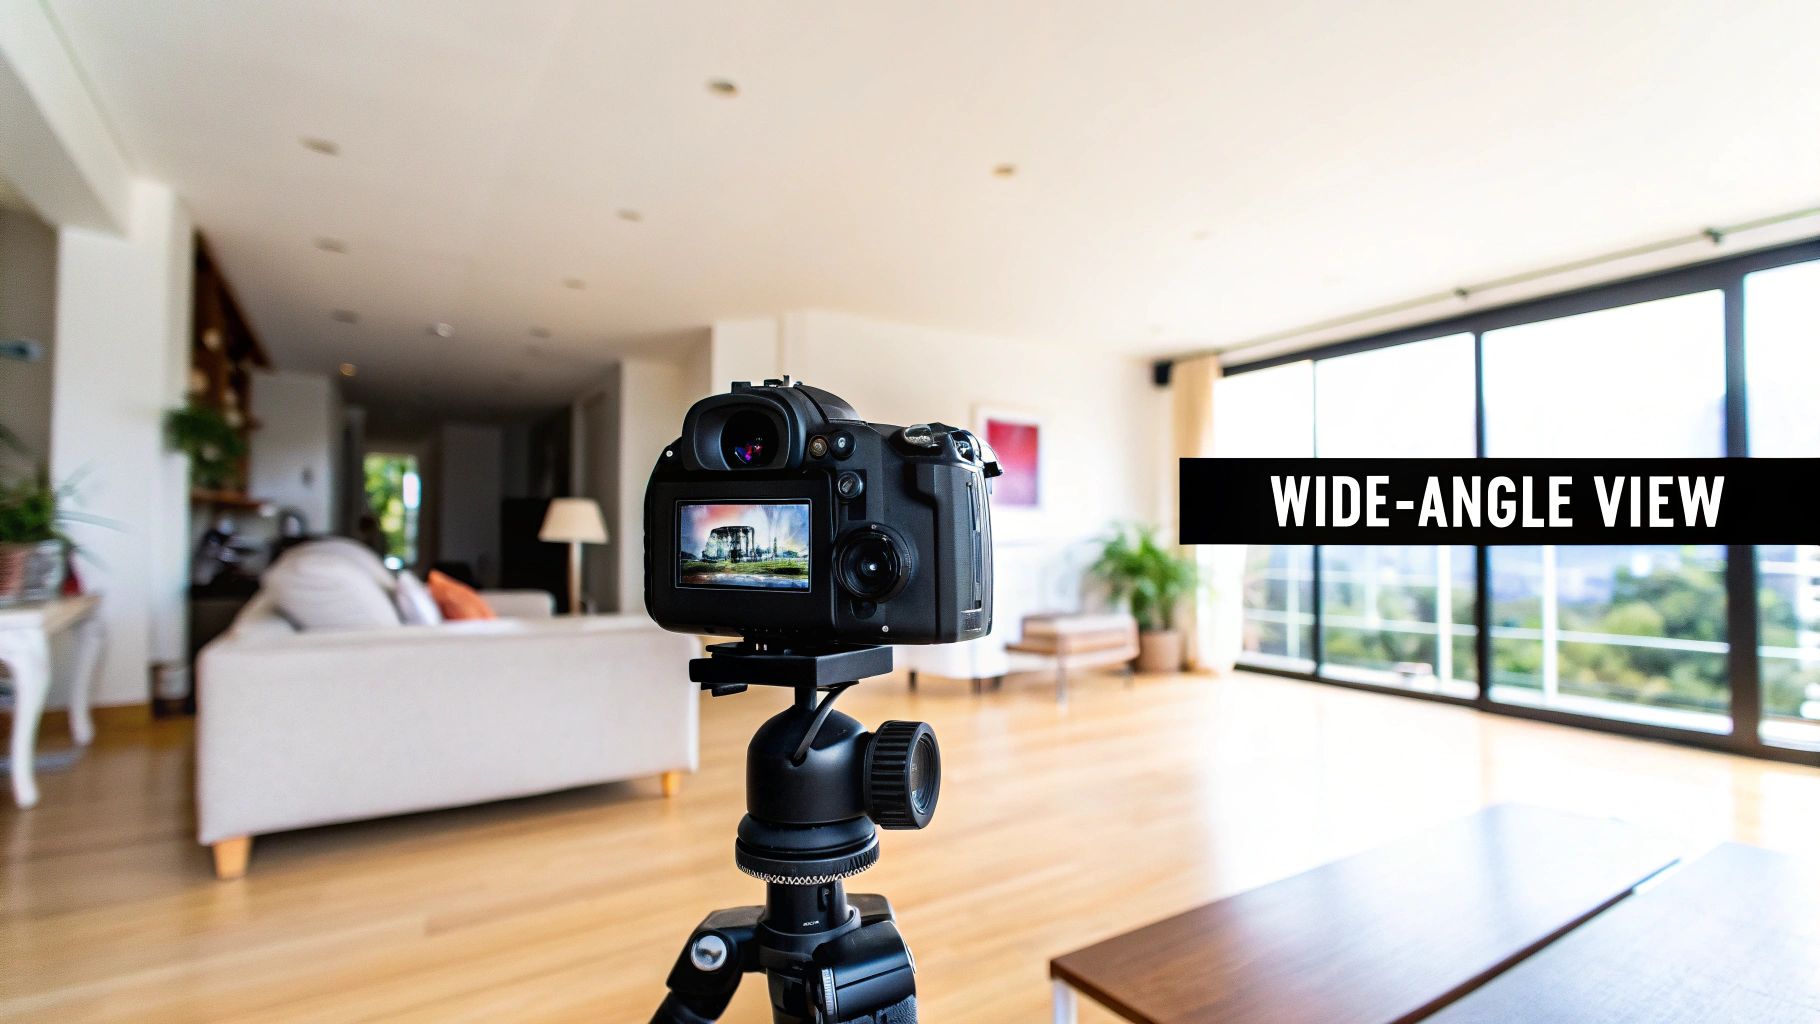
Without a wide-angle lens, you would need to take multiple photos of a single room, which fails to give viewers a true sense of the space and flow. Think of the professional MLS photos you see of spacious, open-concept living rooms or luxury master bedrooms; those are almost always captured using this technique to create a sense of grandeur and possibility.
How to Implement This Tip
To get the best results, it’s not just about attaching the lens. Proper technique is key to avoiding the common pitfalls of wide-angle photography, like distortion that can make a room look unnatural.
- Choose the Right Focal Length: Stick to the 16-24mm range for most interior shots. Going wider (like 14mm) can sometimes introduce too much distortion, making walls look curved or slanted.
- Maintain Straight Lines: Mount your camera on a tripod at chest height (around 4-5 feet). Ensure the camera sensor is perfectly parallel to the walls you are shooting. This simple step is critical for keeping vertical lines straight and preventing a "falling over" effect.
- Correct in Post-Processing: Even with perfect technique, some minor distortion might occur. Use software like Adobe Lightroom or Capture One to apply lens correction profiles, which automatically straighten lines and fix any "barrel distortion."
- Avoid Close-Ups: Wide-angle lenses can distort objects that are too close to them. Keep furniture and other key features a reasonable distance from the lens to maintain their natural proportions and avoid making them look comically large.
2. Perfect Lighting and Golden Hour Photography
Lighting is arguably the single most critical element in real estate photography. The right light can make a property feel warm, spacious, and desirable, while poor lighting can make it seem dark and uninvincing. Tapping into the power of the "golden hour," the first hour after sunrise or the last hour before sunset, provides soft, directional light that brings a property to life with an emotional, high-end appeal.
Professional photographers masterfully blend this ideal natural light with supplemental lighting to eliminate harsh shadows and create stunningly balanced images. Think of luxury homes in Malibu where the golden hour sun glistens off the ocean, or architectural properties where directional sunset light streams through large windows, highlighting the home's best features. This technique creates depth and dimension that stops buyers in their tracks.
How to Implement This Tip
Effectively using light goes beyond just picking the right time of day. It requires planning and a strategic approach to create consistently beautiful photos.
- Plan Around Golden and Blue Hour: Scout the property beforehand to see how the light hits it during golden hour. For dramatic exterior shots with glowing interior lights, schedule your shoot to extend into the "blue hour," the period of twilight just after sunset.
- Use Exposure Bracketing (HDR): To capture detail in both the bright highlights (like a window view) and the dark shadows of a room, use exposure bracketing. This involves taking multiple shots at different exposures and merging them in post-processing to create one perfectly lit image.
- Fill Shadows with Flash: Employ an off-camera flash bounced off a ceiling or wall to gently fill in dark corners. The goal is to supplement, not overpower, the natural light. This technique ensures rooms look bright and even without appearing artificial or "flash-y."
- Balance Interior and Exterior Light: When shooting interiors, turn on all the lights to create a warm, inviting ambiance. Use a flash to balance the interior brightness with the natural light coming through the windows, ensuring the view outside isn't blown out.
3. Shoot in RAW Format and Post-Processing Best Practices
One of the most impactful real estate photography tips for achieving professional-quality images is to shoot in RAW format. Unlike JPEGs, which are compressed and processed in-camera, a RAW file captures all the raw, uncompressed data from the camera's sensor. This gives you maximum flexibility during post-processing to adjust exposure, recover details, and correct colors without degrading the image quality.
Shooting in RAW is what separates amateur snapshots from professional marketing assets. It allows you to salvage challenging shots, such as a room with a brightly lit window. A JPEG might lose all the detail in the window (a "blown-out highlight"), but a RAW file often contains enough data to recover the beautiful view outside, creating a perfectly balanced and high-impact photograph.
How to Implement This Tip
Switching your camera to RAW is the first step, but a consistent post-processing workflow is where the magic happens. This process ensures every photo in your listing looks polished, cohesive, and true to life.
- Set Your Camera to RAW: Dive into your camera's menu and change the image quality setting from JPEG to RAW. For convenience, choose RAW+JPEG mode if available; this gives you a RAW file for editing and a JPEG for quick previews.
- Organize Your Files: Before editing, create a systematic folder structure for each property. This will save you significant time and prevent confusion when managing hundreds of large RAW files.
- Use Professional Editing Software: Invest time in learning software like Adobe Lightroom or Capture One. These programs are designed for efficiently organizing and batch-editing large volumes of RAW photos.
- Develop Consistent Presets: Create or purchase editing presets that align with your brand's style. Applying a consistent preset to all images from a property ensures uniform brightness, warmth, and color, making the listing look cohesive.
- Master Key Adjustments: Focus on essential edits. Correct the white balance for natural-looking walls, straighten vertical and horizontal lines, and use the Clarity and Vibrance sliders moderately to make details pop without looking fake. Recovering details in dark shadows or bright windows is a key advantage of this format.
4. Utilize HDR and Exposure Bracketing Techniques
One of the biggest challenges in real estate photography is dealing with high-contrast scenes, like a dimly lit interior with a bright, sunlit window. High Dynamic Range (HDR) photography solves this problem by combining multiple exposures of the same scene to create a single, perfectly exposed image that captures detail in both the darkest shadows and the brightest highlights.
This technique is essential for creating professional-level real estate photos. Without it, you’re forced to choose between a properly exposed interior (with blown-out, white windows) or a beautiful view outside (with a dark, shadowy interior). HDR allows you to showcase both the inviting indoor space and the stunning outdoor view simultaneously, giving potential buyers the complete picture.
How to Implement This Tip
Exposure bracketing is the process of taking multiple shots at different exposure levels, which you later merge into an HDR image. This method is one of the most reliable real estate photography tips for achieving balanced lighting.
- Use Your Camera's Bracketing Feature: Most DSLRs and mirrorless cameras have an Auto Exposure Bracketing (AEB) setting. Set it to take 3 to 5 exposures to ensure you capture the full dynamic range of the scene.
- Set Your Exposure Increments: For most residential interiors, bracketing in ±1-stop or ±2-stop increments is ideal. A standard 3-shot bracket would be -2, 0, and +2. A 5-shot bracket provides more data for scenes with extreme contrast.
- Keep the Camera Perfectly Still: A sturdy tripod is non-negotiable for HDR. Any movement between shots will result in a blurry, misaligned final image. Use a remote shutter or your camera’s self-timer to avoid camera shake when pressing the shutter button.
- Merge in Post-Processing: Use software like Adobe Lightroom’s "Photo Merge > HDR" or specialized programs like Photomatix Pro. These tools will automatically align and blend your bracketed shots into a single, balanced image.
- Aim for a Natural Look: The goal is a clean, natural-looking photo, not an over-processed, surreal HDR image. After merging, adjust the exposure, highlights, and shadows subtly to create an image that looks true-to-life and inviting.
5. Stage and Declutter Interiors Strategically
One of the most impactful real estate photography tips happens before the camera even comes out: strategic staging and decluttering. This process involves preparing the interior to look its absolute best by removing personal items, minimizing furniture, and creating a clean, neutral canvas. Well-staged homes photograph better, appear larger and more inviting, and allow potential buyers to more easily envision themselves living in the space.

Think of the difference between a lived-in home and a model home. The goal is to make the property feel like the latter. A cluttered room distracts the eye and can make even a large space feel cramped and dark. By decluttering, you highlight the property’s best features, like its beautiful flooring, large windows, or architectural details, rather than the owner's personal collections. This principle is key not just for photos but also for creating compelling listing videos.
How to Implement This Tip
Staging doesn’t have to mean renting expensive furniture. The core principle is subtraction. By removing distractions, you add value and appeal to your photographs.
- Declutter Ruthlessly: Start by removing at least 40-50% of the visible items in every room. This includes excess decor, books, personal photos, and anything that isn't essential to defining the space.
- Depersonalize Completely: Pack away family photos, religious items, children's artwork, and any distinct personal memorabilia. A neutral space allows a wider range of buyers to connect with the home emotionally.
- Deep Clean Everything: Every surface should be spotless, from windows and floors to countertops and appliances. A clean home signals to buyers that the property has been well-maintained.
- Arrange Furniture for Flow: Position furniture to create clear walking paths and showcase the room's scale. In some cases, removing a large chair or table can make a room feel significantly bigger in a photo.
- Add Simple, Elegant Touches: Introduce neutral elements like a vase of fresh flowers, a bowl of green apples in the kitchen, or fresh white towels in the bathroom. These small details add a touch of life without creating clutter.
6. Master Composition Rules: Leading Lines, Rule of Thirds, and Framing
Beyond camera settings and lighting, the composition of your photos is what turns a simple snapshot into a compelling marketing image. Mastering fundamental composition rules like leading lines, the rule of thirds, and framing helps guide a viewer's eye through the photo, create a sense of balance, and highlight the property’s most attractive features. These techniques are essential real estate photography tips for creating professional, engaging images.
A well-composed shot feels naturally pleasing and tells a story about the space. For example, using a hallway to create leading lines that draw the eye toward a bright master bedroom builds anticipation. Framing an exterior shot through an elegant front gate adds a layer of depth and sophistication, making the home feel more exclusive and inviting.
How to Implement This Tip
Integrating these timeless rules into your workflow will dramatically improve your results. The key is to think intentionally about how you arrange the elements within your frame before you press the shutter button.
- Activate Grid Overlays: The easiest way to practice the rule of thirds is to enable the grid display on your camera's LCD screen or smartphone app. This divides your frame into nine equal rectangles.
- Position Subjects Off-Center: Instead of placing the main feature (like a fireplace or kitchen island) in the dead center, position it along one of the grid lines or at an intersection point. This creates a more dynamic and visually interesting photo.
- Use Natural Leading Lines: Look for existing lines within the property to guide the viewer’s gaze. Hallways, pathways, fences, and even the edges of a long dining table can be used to draw attention to a key selling point, like a beautiful view or an open-plan living area.
- Create Depth with Framing: Use natural frames like doorways, arches, or large windows to add context and depth. Shooting a living room from just outside a doorway makes the viewer feel like they are stepping into the space.
7. Capture Exterior Photography and Property Landscapes Effectively
The exterior shot is often the very first image a potential buyer sees, making it the most critical photo for creating a powerful first impression. Effective exterior photography goes beyond a simple snapshot of the front door; it showcases the property's curb appeal, architectural style, and the overall environment, setting the stage for what’s inside. It provides essential context and helps buyers envision themselves arriving home.
A well-composed exterior photograph can highlight a beautifully manicured lawn, a stately entrance, or a sprawling backyard with mature trees. Think of a luxury estate captured at sunset, with warm light accentuating its architectural details, or an aerial drone shot revealing a two-acre property with a stunning pool. These images don't just show a house; they sell a lifestyle. This is one of those real estate photography tips that directly impacts click-through rates on listings.
How to Implement This Tip
Mastering exterior shots requires an eye for angles, an understanding of light, and attention to detail. The goal is to present the property in its best possible light, literally and figuratively.
- Shoot During the "Magic Hours": The golden hour (the first hour after sunrise and the last hour before sunset) provides soft, warm, and flattering light. For a more dramatic and luxurious feel, shoot during the blue hour (the period just after sunset) with all the home's interior and exterior lights turned on.
- Vary Your Angles: Don't just shoot straight-on. Capture multiple angles, including the front facade, side views, back of the house, and shots from the corners of the property line to show its scale. A shot from the street level that uses a pathway as a leading line can be very effective.
- Highlight Key Features: Include important elements like landscaping, the driveway, porches, architectural details like stonework, and any outdoor living spaces. These features contribute to the property's overall appeal and value.
- Frame to Hide Imperfections: Be mindful of your surroundings. Position yourself to minimize or exclude distracting elements like power lines, trash cans, or a busy street. Sometimes a slight change in angle is all it takes to create a cleaner, more appealing composition.
8. Detail Photography: Showcasing Unique Features and Selling Points
While wide-angle shots provide a sense of space, detail photography tells a story of quality and craftsmanship. This technique involves capturing close-up images of a property’s distinctive features like granite countertops, hardwood floors, custom cabinetry, and luxury fixtures. These shots complement full-room photos by highlighting the high-value elements that justify a home's asking price and make it stand out from the competition.

Think of a luxury kitchen with intricate veining in the marble countertops or a master bathroom featuring a high-end rainfall showerhead. Detail shots allow potential buyers to zoom in on these premium finishes, helping them appreciate the investment made in the home. These images add a layer of perceived value and create an emotional connection by showcasing the lifestyle the property offers.
How to Implement This Tip
Effectively capturing details requires a thoughtful approach to highlight texture, quality, and unique characteristics without overwhelming the viewer.
- Create a "Key Features" Shot List: Before shooting, identify 8-15 standout features of the property. This could include designer brand appliances, custom-built shelving, intricate tile work, or a unique fireplace mantel.
- Use Flattering Angles and Lighting: Get close to your subject and experiment with different angles. Use natural light to highlight textures, like the grain of hardwood floors or the pattern in a stone countertop. Avoid harsh, direct flash which can create glare.
- Focus on Texture and Quality: A macro lens is ideal, but most modern cameras can focus closely. The goal is to fill the frame with the detail, showing off the material's quality. For example, capture the brushed finish on a stainless steel appliance or the clean grout lines in a new tile installation.
- Showcase Lifestyle Elements: Go beyond static objects. A shot of a crackling fireplace can evoke a feeling of warmth and coziness. Similarly, a close-up of a high-tech smart-home thermostat can appeal to tech-savvy buyers, making this one of the most impactful real estate photography tips for modern homes.
9. Use Virtual Tours, 360-Degree Photos, and Video Walk-Throughs
While static images are the foundation of any real estate listing, one of the most powerful real estate photography tips for the modern market is to incorporate immersive content. Virtual tours, 360-degree photos, and video walk-throughs give potential buyers a deeper, more engaging way to explore a property from anywhere in the world, helping them form a stronger emotional connection before ever stepping inside.
These dynamic formats allow buyers to control their viewing experience, looking up at ceiling details or down at flooring, and understanding the home's layout in a way that photos alone cannot convey. For example, a Matterport 3D tour lets a user "walk" through a luxury estate, while a smooth video walk-through of an urban condo shows the seamless flow from the entryway to the master suite. This level of detail helps pre-qualify buyers and reduces unnecessary in-person showings.
How to Implement This Tip
Creating effective virtual content requires a blend of the right technology and a strategic approach to showcasing the property's best features.
- Choose the Right Format: Use 360-degree photos for key vantage points like the living room or kitchen. For high-end or complex properties, invest in a professional Matterport service (typically $150-$250) to create a full 3D "dollhouse" model. Video walk-throughs are excellent for showing a property's flow and lifestyle appeal.
- Shoot High-Quality Video: Record walk-throughs in 4K resolution using a gimbal or stabilizer for smooth, steady movement. Film during the golden hour to capture the best natural light, making the home feel warm and inviting.
- Keep It Concise and Engaging: Aim for a walk-through video that is 3-5 minutes long to maintain viewer engagement. Include smooth transitions between rooms to clearly show the spatial relationships and layout.
- Enhance and Distribute: Add simple background music and text overlays to highlight key features like "newly renovated kitchen" or "private balcony." Host your tours and videos on the property website, Zillow, and Trulia for maximum visibility. For more guidance on turning your footage into a polished final product, learn more about using a real estate video editor.
10. Invest in Professional Equipment and Optimize Camera Settings
While smartphone cameras have improved dramatically, investing in professional-grade equipment is a non-negotiable step for producing consistently high-quality real estate photos. The right gear, combined with optimized camera settings, provides the control and quality needed to make a property shine and is a cornerstone of effective real estate photography tips. This means using a dedicated camera, a sturdy tripod, and the correct lens to capture sharp, well-lit, and appealing images.
Think of a luxury listing shot with a Sony A7R IV and a premium wide-angle lens versus one shot on a phone. The professional setup captures superior dynamic range, detail, and color accuracy, which translates into more engaging listings. This investment not only improves photo quality but also enhances your brand's reputation for professionalism, which can be just as crucial when marketing high-end properties.
How to Implement This Tip
Investing in equipment is only half the battle; knowing how to use it is what creates stunning results. Mastering manual camera settings gives you full creative control over the final image.
- Prioritize a Full-Frame Camera and Wide-Angle Lens: A full-frame camera captures a wider field of view and performs better in low light. Pair it with a quality 16-35mm wide-angle lens, as this combination will be used for over 80% of your shots.
- Shoot in Manual Mode (M): To ensure consistent exposure from room to room, shoot in manual mode. Set your aperture between f/8 and f/11 to keep the entire room in sharp focus. Adjust your shutter speed to achieve the correct brightness, and keep the ISO as low as possible (100-400) to avoid grainy images.
- Use a Tripod and Remote Shutter: Mount your camera on a sturdy tripod to eliminate blur from camera shake, especially with slower shutter speeds common in interior photography. Use a 2-second self-timer or a wireless remote to trigger the shutter without touching the camera.
- Master White Balance: Set a custom white balance using a grey card or use the Kelvin (K) setting to ensure colors are accurate and consistent throughout the property. This prevents walls from looking yellow in one photo and blue in another. These professional techniques are also foundational for creating high-quality listing videos, which you can explore further by learning more about turning photos into compelling real estate videos.
10-Point Real Estate Photography Tips Comparison
| Technique | 🔄 Implementation Complexity | ⚡ Resource Requirements | ⭐ Expected Effectiveness | 📊 Expected Outcomes / Impact | 💡 Ideal Use Cases & Quick Tips |
|---|---|---|---|---|---|
| Use Wide-Angle Lenses (14-24mm) | Moderate — needs composition and distortion control | Moderate — quality wide lens + tripod | High — expands field of view, shows full rooms | Larger-looking rooms, fewer shots; strong marketing appeal | Interiors/small rooms; keep camera parallel to walls, correct barrel distortion |
| Perfect Lighting & Golden Hour Photography | High — timing and light balancing required | Moderate — scheduling, reflectors, portable lights | Very High — enhances mood and perceived value | Warmer, more inviting images; perceived value +10–15% | Scout ahead, bracket exposures, use reflectors and fill flash |
| Shoot in RAW & Post-Processing Best Practices | Moderate–High — editing skill and workflow needed | High — storage, fast cards, editing software | Very High — maximum quality and recoverability | Consistent, market-ready images; recover highlights/shadows | RAW+JPEG, use presets, backup storage, avoid over-processing |
| Utilize HDR & Exposure Bracketing | Moderate — tripod + tone-mapping technique | Moderate — tripod, extra files, HDR software | High — preserves window views and interior detail | Balanced dynamic range; more natural blended images | 3–5 exposures ±1–2 stops, use tripod, avoid moving elements |
| Stage & Declutter Interiors Strategically | Low–Moderate — coordination and staging decisions | Variable — time, homeowner cooperation, rental fees | High — improves perceived space and buyer connection | Faster sales, higher offers; magazine-quality photos | Remove 30–50% of items, neutral palette, deep clean before shoot |
| Master Composition Rules (Leading Lines, Rule of Thirds) | Low–Moderate — practice and intentional framing | Low — camera grid/education | High — more engaging, professional-looking images | Increased viewer focus on selling features; better engagement | Use grid overlay, place subjects on intersections, use doorways as lines |
| Capture Exterior & Property Landscapes Effectively | Moderate — timing, angles, drone/legal considerations | Moderate–High — wide lens, drone, ND filters | High — establishes curb appeal and context | Strong first impressions; aerial context; luxury ambiance | Shoot golden/blue hour, capture multiple angles, follow drone regs |
| Detail Photography: Unique Features & Selling Points | Low–Moderate — selective focus and styling | Low–Moderate — macro/prime lenses, time per shot | Medium–High — highlights high-value elements | Supports pricing justification; emotional connection | Select 8–15 features, use macro lenses and flattering angles |
| Virtual Tours, 360° Photos & Video Walk-Throughs | High — capture, stitching, editing and hosting skills | High — 360 cameras, Matterport, drones, hosting fees | Very High — immersive and highly engaging | Increases engagement (300–400%); faster sales; better filtering | Use Matterport for luxury, 4K walk-throughs, keep tours 3–5 min |
| Professional Equipment Investment & Settings Optimization | High — gear mastery and calibration | Very High — camera bodies, lenses, lights, backups | Very High — consistent pro-quality results | Reliable high-resolution images; higher operational costs | Prioritize wide-angle lens, shoot manual, maintain backups and presets |
From Static Photos to Dynamic Videos: The Final Step
You've just navigated a comprehensive guide filled with actionable real estate photography tips, from mastering the technical nuances of your camera to the artistic subtleties of composition. We've covered the critical groundwork: the decluttering that precedes the first click, the strategic use of wide-angle lenses to create a sense of space, and the magic of shooting in RAW to unlock post-production potential. Each tip is a crucial piece of a larger puzzle, designed to transform a simple property listing into a compelling visual story.
Remember, the goal isn't just to take pictures. It's to capture the feeling of a home. It's about translating the warmth of the morning light through a kitchen window, the inviting comfort of a living room, and the serene potential of a backyard oasis into a two-dimensional image. By applying these techniques, you are no longer just documenting rooms; you are marketing a lifestyle.
Key Takeaways for Immediate Impact
To truly elevate your listings, focus on integrating these core principles into a consistent workflow. Don't treat them as a checklist, but as a holistic approach to visual marketing.
- Preparation is Paramount: The most technically perfect photo cannot save a cluttered, poorly staged room. Your work begins long before you pick up the camera. Decluttering, cleaning, and thoughtful staging lay the foundation for every successful shot.
- Light is Your Language: Whether you're harnessing the soft glow of the golden hour for exteriors or balancing interior light with HDR bracketing, your ability to control and shape light will define the quality of your work. Always prioritize bright, natural, and inviting illumination.
- Composition Creates Connection: The rule of thirds, leading lines, and framing are not just abstract artistic rules. They are powerful tools that guide a buyer's eye through a space, creating a sense of flow, depth, and engagement that makes them feel as if they are already there.
- Technology is Your Ally: From shooting in RAW to leveraging AI for video creation, modern tools are designed to make your job easier and your results more professional. Embrace these technologies to streamline your editing process and expand your marketing capabilities beyond static images.
The Evolution from Still Images to Engaging Video
Mastering these real estate photography tips is the first, and most critical, step. You now have a collection of stunning, high-quality images that accurately and beautifully represent the property. But in today's fast-paced digital marketplace, where attention spans are short and competition is fierce, static photos are often just the starting point. The ultimate goal is to stop the scroll, and nothing does that more effectively than video.
Video content tells a more complete story. It guides potential buyers on a seamless journey through the property, revealing how rooms connect and establishing a true sense of place and flow. This was once the exclusive domain of expensive videographers with specialized equipment. Now, the barrier to entry has vanished.
The final, transformative step in your workflow is to convert your perfected photos into dynamic, cinematic video tours. Imagine turning your carefully composed shots into smooth pans, dramatic reveals, and engaging walkthroughs, all synchronized to music. This is how you capture the hearts and minds of modern buyers on platforms like Instagram, TikTok, and Zillow. By combining your exceptional photography skills with the power of automated video, you create a comprehensive marketing package that ensures your listings not only get seen but get remembered.
Ready to effortlessly transform your high-quality photos into stunning, scroll-stopping listing videos? AgentPulse uses AI to automatically create cinematic tours from your still images, helping you market properties more effectively and win more clients. Discover how to elevate your listings at AgentPulse.