Think of your listings for a moment. Are they just a collection of pretty pictures, or do they tell a story? That's the difference a real estate tour video makes. It transforms a static online listing into a living, breathing experience, letting potential buyers feel the home before they ever step inside.
It’s like comparing a movie trailer to a poster. One gives you a glimpse, but the other builds genuine excitement and emotion. In today's market, moving from passive viewing to active engagement isn't just a nice-to-have; it's essential.
Why Video Is Your Most Powerful Listing Tool

Let's be honest: in a sea of online listings, photos alone just don't cut it anymore. A well-made video does what images can't—it shows the flow of a home, captures its unique atmosphere, and gives a true sense of what it’s like to live there. It’s the bridge that gets a casual browser to book a showing.
This approach also brings you better leads. Buyers who've already taken a virtual tour are far more invested. When they show up for an in-person visit, they’re not just curious; they're genuinely interested and already picturing their life there.
Capturing Attention and Driving Action
The whole point of a tour video is to make a buyer feel like they’ve already arrived. You’re not just selling rooms and features; you’re selling the lifestyle that comes with them.
- Emotional Connection: The right music and pacing can create a mood that helps buyers instantly connect with the space.
- Spatial Understanding: Smooth camera work finally answers the question, "How do these rooms connect?" It gives a real feel for the layout that photos often distort.
- Increased Trust: A professional, transparent video tour shows you have nothing to hide. It builds credibility and proves you're confident in the property. For a deeper dive, check out our complete guide on real estate video marketing.
The numbers don't lie. Just look at how dramatically video changes the game for a typical listing.
Impact of Video Content on Key Real Estate Metrics
Here’s a quick summary of the tangible benefits of incorporating video into real estate listings, showing the dramatic difference it makes across various performance indicators.
| Metric | Listings Without Video | Listings With Video | Impact |
|---|---|---|---|
| Inquiries | Base Level | 403% More Inquiries | Massive increase in leads |
| Time on Listing | ~1.5 Minutes | ~5 Minutes | 3x+ Longer Engagement |
| Lead Quality | Lower (Passive Browsing) | Higher (Pre-qualified Interest) | More serious, motivated buyers |
The results are clear. Videos keep people on your page longer and bring in genuinely interested buyers.
The bottom line is that listings with video get an incredible 403% more inquiries than those without. That single statistic says it all. You're not just getting more attention; you're getting the right attention from people who are ready to act.
By transforming a listing from a collection of data points into a compelling narrative, real estate tour videos create a sense of presence and desire that accelerates the buyer's journey from casual interest to serious consideration.
Ultimately, video isn't just a fancy add-on anymore. It's a core piece of a winning strategy that makes your listings shine, attracts a wider audience, and delivers qualified leads right to your door.
Choosing the Right Type of Real Estate Video
Not all property videos are created equal. Think of it like a movie release—you have the quick, exciting trailer, the full-length feature film, and maybe even a behind-the-scenes special. Your listing needs the right video for the right audience, and picking the right format is the first step toward hitting your marketing goals.
You wouldn't use a flashy, high-energy teaser to give a serious buyer an in-depth look at a home, right? The video you post on Instagram Reels to create buzz is completely different from what a buyer expects to see on the MLS. Let's break down the main types so you can match the video to the mission.
The Guided Walkthrough Video
This is your classic, bread-and-butter tour. The whole point of a walkthrough is to give someone a genuine feel for the property's layout and flow. It’s like you’re personally walking a potential buyer through the front door, showing them how the living room connects to the kitchen and where the bedrooms are.
Here, clarity trumps creativity. The camera should move smoothly and logically, mimicking how someone would naturally walk through the space. A great walkthrough answers the number one question on a buyer's mind: "What does it actually feel like to be in this home?"
- Best Use Case: Perfect for MLS listings, your website’s property pages, and YouTube channels where buyers are actively digging for details.
- Ideal Length: Aim for 2-4 minutes. That’s the sweet spot to show everything without viewers dropping off.
- Goal: Give a full, honest picture of the property. This builds trust and helps weed out people who aren't a good fit before they even book a showing.
The Cinematic Teaser Video
If the walkthrough is the full movie, the cinematic teaser is the action-packed trailer. This video is all about grabbing attention and sparking an emotional connection in seconds. It uses quick cuts, dramatic camera movements, and an upbeat soundtrack to showcase the home's absolute best features.
You're not showing every nook and cranny. Instead, you're focusing on the money shots: the incredible sunset view from the deck, the gleaming new appliances in the kitchen, or the cozy fireplace. The goal is simple: stop the scroll and make someone think, "Wow, I need to see more of that place."
A cinematic teaser isn’t trying to tell the whole story. It’s designed to create curiosity. By selling a lifestyle instead of just a floor plan, it gets people excited and drives them to the full listing.
These short, punchy videos are tailor-made for social media platforms like Instagram and TikTok, where you have only a few seconds to make an impression.
The 3D Virtual Tour
For the most hands-on experience, nothing beats a 3D virtual tour. This technology creates a "digital twin" of the property, letting buyers explore every inch on their own terms. Using special cameras, you capture the entire home, allowing users to virtually walk from room to room, look up at the ceilings, and even inspect the hardwood floors.
This puts the buyer in complete control. They can spend as much time as they want in the kitchen or double-check the master bedroom's dimensions. It's an incredibly powerful tool for out-of-town buyers or anyone who wants to do their homework before scheduling a visit.
The results speak for themselves. An analysis of MLS data revealed that listings featuring 3D tours can sell up to 31% faster than those without. This kind of deep engagement often means less time on the market. You can explore more data on how 3D tours are changing the market on Imagtor.com.
Your Step-by-Step Video Production Plan
Making a great real estate video isn’t magic—it’s a process. Just like building a house, you need a solid plan before you ever pick up a tool. If you break the project down into three simple stages—Pre-Production, Production, and Post-Production—what seems like a huge task becomes totally manageable.
This approach means you're not leaving anything to chance. You'll end up with a polished, professional video that grabs buyers' attention and shows off the property at its absolute best. Let's walk through what that plan looks like.
This visual shows how different video types fit into the bigger picture, starting with simple walkthroughs and moving up to more immersive cinematic and 3D experiences.

Each video style builds on the last, offering a deeper connection with the home to meet different marketing goals and buyer expectations.
Stage One: Pre-Production and Planning
This is where the real work happens, long before you even think about hitting the record button. Honestly, solid planning is the single most important part of creating a video that works. If you rush this step, you’ll end up with a mess of disorganized clips, wasted time on site, and a final video that just feels amateur.
First, you need to define your story. What are the three to five things that make this house special? Is it the way the morning sun floods the kitchen? The huge backyard built for entertaining? Or that cozy little reading nook at the top of the stairs? Your video needs to tell a story that brings these selling points to life.
Next, make a shot list. This isn't just a list of rooms to film; it’s a detailed plan of every single shot you need to get. A good shot list tells that story you defined, guiding the viewer through the home in a way that feels natural and emotionally engaging.
- The Big Picture: Start with a wide "establishing shot" of the outside to set the scene.
- Focus on the Best Parts: Plan specific shots for those highlight features, like a slow pan across the granite countertop or a dramatic reveal of the master bathroom’s spa tub.
- Create a Smooth Flow: Think about how you’ll move from one space to the next. Plan for transition shots, like filming as you walk through a doorway, to connect the tour seamlessly.
Finally, get the property ready. Declutter every single surface, clean until it sparkles, and check every lightbulb. A prepped home looks a thousand times better on camera. For a complete rundown, check out our guide on creating the perfect real estate listing video.
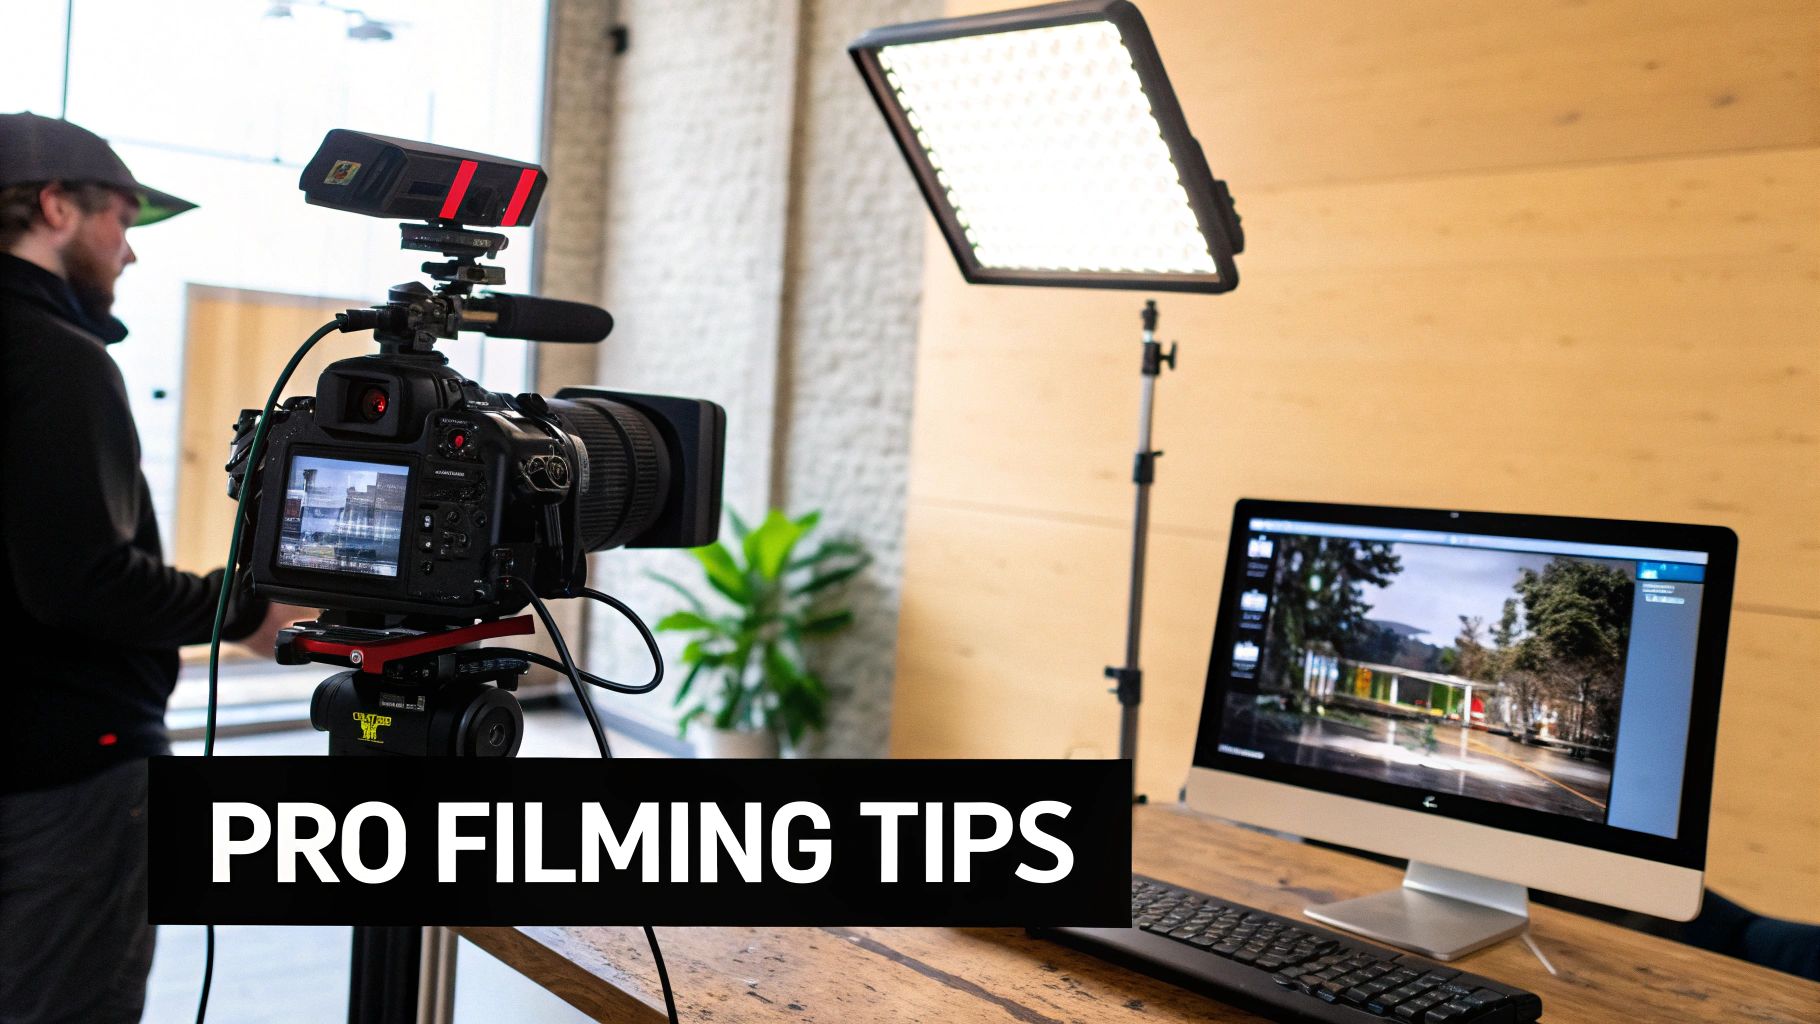
Stage Two: Production and Filming
With your plan locked in, it’s showtime. During this phase, your only job is to execute that shot list perfectly while keeping an eye on technical details like lighting and stability.
You don’t need a Hollywood budget for equipment. A modern smartphone and a gimbal—a handheld device that keeps your phone steady—can produce incredibly smooth, professional-looking video. A gimbal is the secret to avoiding that shaky, homemade look that screams amateur.
Pro Tip: Your camera movements should always be slow and deliberate. Every pan, tilt, or slide needs to have a purpose—whether it’s revealing a beautiful view, showing off the size of a room, or guiding the viewer's eyes to a key feature.
Natural light is your best friend. Try to schedule your shoot when the house is at its brightest, which is usually mid-morning or early afternoon. Open every blind, pull back every curtain, and turn on all the interior lights to create a warm and welcoming vibe.
Stage Three: Post-Production and Editing
Now that you've got all your clips, it's time to put the puzzle together. In post-production, you’ll assemble your story by editing the footage, adding music, and polishing the final look.
The first step in editing is sequencing. Arrange your clips in the order of your shot list to create a logical flow that makes someone feel like they're actually walking through the home. Keep the pace interesting by mixing wide shots with close-up details.
Next up, music. The right soundtrack sets the entire mood. Pick royalty-free music that fits the home’s personality—maybe something upbeat for a modern condo or a calm, orchestral piece for a classic suburban house. Just make sure it enhances the video without being distracting.
Finally, you’ll do color correction. This step makes sure the colors look consistent and vibrant from one clip to the next. Even tiny adjustments here can make your footage look way more professional and turn a good video into a great one.
Pro Tips for Filming and Editing Engaging Videos
Anyone can press "record," but creating a video that truly captivates a buyer is an art. A few professional techniques can transform a simple recording into a powerful marketing tool that makes a listing feel irresistible.
You’re not just showing a house; you're crafting an experience. The goal is to make viewers feel the sunlight pouring through the windows and imagine themselves walking from room to room. Let's get into the specifics of how to make that happen.
Mastering Light and Motion
Great video always starts with great light. Whenever possible, shoot during the day to take advantage of natural sunlight. Throw open every blind and curtain you can find—this makes spaces feel bright, airy, and welcoming, a look that buyers universally love.
Next up is motion. Shaky, handheld footage is an instant turn-off and can make even the most beautiful home feel chaotic. The secret to a professional look is using tools like a gimbal or a slider to create smooth, cinematic movements that gently guide the viewer's eye.
- Sliders are fantastic for slow, controlled horizontal pans, perfect for revealing a gourmet kitchen or a spacious living area.
- Gimbals are your go-to for fluid walking shots, giving the viewer the feeling of gracefully gliding through the home.
These tools aren't just for show. They create a calm, immersive feel that helps a buyer connect with the property on an emotional level. This quality is now the standard, especially when you factor in stunning aerial shots.
In fact, drone footage has become a huge part of real estate marketing. It’s estimated that around 80% of active listing agents now use drones to showcase properties from a compelling bird's-eye view. The results speak for themselves, with properties featuring aerial visuals often selling 68% faster. You can see more data on this trend at PhotoUp.net.
Building a Narrative Through Editing
Editing is where the magic really happens. This is your chance to assemble all your clips into a cohesive story that builds an emotional connection with the viewer. Don't just show rooms in a random sequence; think like a director and create a logical, engaging path through the home.
Kick things off with a strong establishing shot—maybe a gorgeous exterior view at golden hour or a slow pan across a stunning main living area. From there, sequence your clips to mimic a natural walkthrough. It’s crucial to mix wide shots that establish the space with tighter detail shots that highlight premium features, like custom cabinetry or designer light fixtures.
The most effective real estate tour videos tell a story without saying a word. The sequence of shots, the pacing of the edits, and the choice of music should all work together to evoke a feeling of 'home' and aspiration.
Music choice is absolutely critical. Always use licensed, royalty-free music that fits the home's personality—think upbeat and modern for a city condo or calm and classical for a traditional suburban house. The right soundtrack elevates the entire experience. For a deeper dive into post-production, check out our guide on real estate video editing.
Formatting for Maximum Reach
So, you've shot and edited a beautiful video. You're not done yet. To truly maximize its impact, you have to format it correctly for the different platforms where people will see it. A one-size-fits-all approach just won't cut it anymore.
Every platform has its own audience and technical quirks. A widescreen video made for YouTube will get awkwardly cropped on Instagram Stories, while a vertical video will look tiny and out of place on an MLS listing. Optimizing for each ensures your hard work looks fantastic everywhere.
Here’s a simple cheat sheet to help you format your videos for the top real estate platforms.
Video Formatting Guide for Top Real Estate Platforms
| Platform | Recommended Aspect Ratio | Ideal Length | Key Content Focus |
|---|---|---|---|
| YouTube & MLS | 16:9 (Widescreen) | 2–4 minutes | In-depth, comprehensive property walkthroughs and cinematic tours. |
| Instagram Reels | 9:16 (Vertical) | 15–60 seconds | Fast-paced, engaging highlight reels showing off the best features. |
| Facebook Feed | 4:5 (Vertical) or 1:1 (Square) | 1–2 minutes | Shorter cinematic teasers or quick walkthroughs with clear text overlays. |
By tailoring your video for each platform, you're meeting potential buyers where they are and giving them the best possible viewing experience. This simple step can dramatically boost the effectiveness of your video marketing.
You've poured your heart into creating a stunning video tour. Now what?
Hitting "export" is only half the job. A brilliant film that nobody sees is just a file taking up space on your hard drive. To turn that video into a magnet for serious buyers, you need a smart plan to get it in front of the right eyeballs.
Think of it this way: when a new restaurant opens, they don't just unlock the doors and hope people show up. They run ads, send out invites, and build a buzz. Your video deserves that same grand opening treatment to make a real splash right from the start.
Building Your Core Distribution Channels
A solid distribution strategy needs to hit people from multiple angles, catching them wherever they are in their home-buying journey. Just slapping the video on the MLS and calling it a day is a massive missed opportunity. Your core plan has to include the platforms where buyers actually spend their time.
First up is YouTube. It's the world's second-biggest search engine, making it a goldmine for buyers actively looking for property tours. Getting your video optimized here is non-negotiable for long-term visibility.
Next, you need to hit the social media scene to generate that initial wave of excitement. Facebook and Instagram are incredible tools for sharing eye-catching content and reaching specific audiences, both through your regular posts and with a little ad spend.
Optimizing for YouTube Search Success
Simply uploading your video to YouTube won't cut it. You have to give the algorithm clues about what your video is, so it knows who to show it to. This all starts with a keyword-focused title. Instead of just "123 Main Street," try something like "Luxury Home Tour | 123 Main Street, Anytown | Real Estate For Sale."
The video description is just as critical. Write a few solid paragraphs that walk through the property’s best features, amenities, and neighborhood perks, weaving in relevant keywords as you go. Don't forget to add tags for the address, city, zip code, and general terms like "house tour," "real estate video," and "property tour."
A well-optimized YouTube video becomes an evergreen marketing asset. It can keep pulling in qualified buyers for weeks or even months, working for you 24/7 long after the initial launch.
This basic SEO work gives your video a life beyond day one, capturing organic traffic from serious buyers who are actively searching.
A Launch Day Checklist for Maximum Buzz
To get the biggest bang for your buck, you want to coordinate everything for a single "launch day." This creates a concentrated burst of activity that tells all the platform algorithms that your content is hot.
- MLS and Zillow Upload: Start here. Get the video onto the official MLS listing and major sites like Zillow. This covers the buyers who are already deep in the search.
- YouTube Premiere: Schedule your video as a YouTube "Premiere." It builds a little anticipation and sends a notification to your subscribers the moment it goes live.
- Email Blast to Your Network: Draft a quick email to your contact list—past clients, current leads, and fellow agents—announcing the new listing and linking directly to the video.
- Social Media Blitz: Post the video natively on Facebook. For Instagram, chop up a shorter, vertical teaser for Reels and Stories, always linking back to the full tour.
- Targeted Ad Campaign: Put a small, targeted ad budget to work on Facebook or Instagram. You can laser-focus on users by location, income, and even interests like "Zillow" or "first-time home buyer."
This coordinated push ensures your video gets seen by the largest possible audience in those crucial first 48 hours.
Tracking the Metrics That Actually Matter
Finally, you have to know what's working. Don't get lost in vanity metrics like the total view count. Instead, focus on the data that tells you if you're actually connecting with your audience.
- View Duration: This is probably the most important metric of all. A high average view duration means people are genuinely hooked, not just clicking away after five seconds.
- Click-Through Rate (CTR): For YouTube and your emails, a high CTR tells you that your title and thumbnail are compelling enough to make people stop scrolling and click.
- Audience Retention: Dive into your video’s analytics and see where people are dropping off. If there's a mass exodus at a certain point, you've likely found a slow spot in the tour that you can improve next time.
By keeping an eye on these engagement metrics, you can fine-tune your strategy and make even better real estate tour videos down the road.
How to Scale Your Real Estate Video Production
Let's be honest: creating a high-quality video for every single listing feels like a monumental task. For busy agents and photographers, the time and cost involved in traditional videography can be a major roadblock. Hiring a pro for each property gets expensive fast, with a simple one-minute video easily costing anywhere from $200 to over $800.
That old-school model just doesn't scale.
But what if you could create a polished, engaging video tour for every property—without ever touching a camera or hiring an editor? The secret to scaling up your video production isn't about working harder. It’s about working smarter with the right tools.
Embracing Software for Scalable Video
This is where modern software comes in. New platforms have been designed to solve this exact problem, taking the on-site shoots and complex editing out of the equation.
The idea is simple but incredibly powerful: these tools transform your existing high-resolution property photos into dynamic, cinematic video tours. By using the photos you already have, you can skip the biggest time and money sinks in the entire video creation process.
Scaling isn't just about churning out more videos. It's about delivering consistent, top-tier marketing for every listing. That consistency builds your brand, attracts more clients, and gives you a serious leg up on the competition.
With this approach, a solo real estate photographer can suddenly add a video package to every photoshoot, opening up a brand-new revenue stream. In the same way, an agent can give every single property a professional video tour to maximize its reach, all without blowing their marketing budget.
How AI-Powered Tools Get the Job Done
The real shift happened with the introduction of AI. Platforms like AgentPulse use smart technology to analyze your still photos and bring them to life with motion.
Here’s a look at how it actually works:
- Photo Analysis: First, the AI engine scans each photo to understand the room's layout. It identifies key features like windows, furniture, and architectural details that should be highlighted.
- Cinematic Motion Planning: Based on what it sees, it automatically creates smooth, professional-looking camera movements. Think gentle pans, slow zooms, and dramatic reveals that look like they were shot by a seasoned videographer.
- Automated Assembly: Finally, the system stitches these animated shots together into a story, adds perfectly matched royalty-free music, and renders a finished video tour in just a few minutes.
This automated workflow turns a process that used to take hours (or even days) into a simple three-step routine: upload photos, pick a style, and export your video. This is what makes it finally possible to produce compelling real estate tour videos for every single listing, every single time.
Common Questions About Real Estate Tour Videos
Jumping into video can feel like a big leap, even when you know all the benefits. It's totally normal for questions to pop up, covering everything from how much it costs to what gear you actually need. Let's clear the air and tackle some of the most common worries so you can hit that record button with confidence.
Cost is a big one. Hiring a pro videographer can run you anywhere from $200 to over $800 for a single property video. That's a fantastic option for a luxury listing, but it's not always realistic for every single home you sell. Knowing your options here makes all the difference.
Time is another huge factor. How many hours will you sink into shooting, editing, and getting the final video out there? This is where a smart plan and the right tools can be a game-changer, turning what feels like a multi-day project into a quick and easy part of your workflow.
How Long Should My Video Be?
There's no magic number here—the perfect video length really depends on where you're posting it and what you want it to achieve. But there are definitely some proven guidelines that work.
- For the MLS and YouTube: Think 2 to 4 minutes. That’s the sweet spot for a detailed walkthrough that shows off the home's best features without viewers dropping off.
- For Social Media (Instagram/TikTok): Go for short and punchy. A 30 to 60-second highlight reel with great energy is what you need to stop people from scrolling past.
Do I Need Expensive Equipment?
Nope, you absolutely don't. While a high-end camera rig is nice to have, you can shoot incredible videos using a modern smartphone and a simple gimbal to keep things steady. It’s not about the price of the gear; it's all about how you use it.
Good lighting and smooth, stable movement will always beat an expensive camera with shaky footage. Nail these two things first, and your videos will look polished and professional no matter what you're shooting on.
Think about it: when people are scrolling through Zillow or social media, they're looking for a clear, authentic look at the property. A clean, steady video from your phone is way more effective than a wobbly video from a fancy camera. This makes it easier than ever for any agent to get started with quality video.
Ready to create stunning videos for every listing without the time and expense? AgentPulse uses AI to turn your existing property photos into captivating video tours in just minutes. Learn more and start creating for free on agentpulse.ai.