AgentPulse Help Guide
Learn how to create, edit, generate, preview, and download video projects with AgentPulse.
What AgentPulse Does
AgentPulse turns your listing images and project settings into short, shareable videos. You choose the order, text, music, and aspect ratio; the system generates animated scenes and combines them into one video you can use on social media and in listings.
You can:
- Create and name projects
- Upload and organize image assets (each image is one scene)
- Choose an animation style for each scene
- Add text and background music
- Choose aspect ratios for different platforms
- Generate video outputs using credits (generation is done per scene; the system then combines all scenes into the final video using your settings—music, scene order, text, etc.)
- Preview results and download final files
Why AgentPulse? Video tours help you reach more buyers and stand out. AgentPulse is ideal for social media—use it for posts announcing an open house, a new listing, or a recently sold home, and include a video tour for better reach on Instagram, TikTok, Facebook, and YouTube. Use videos in MLS listings to attract more attention and showcase properties better than photos alone. And because you create videos from your existing listing photos, AgentPulse is faster and more affordable than hiring a videographer—you get professional-style video tours without the wait or the high cost.
If you are new to the platform, follow this guide from top to bottom once, then use the quick workflow section for daily use.
Before You Start
Before creating a project, make sure the following are ready:
- You are signed into your AgentPulse account
- Your account has enough credits for generation
- Your media files are prepared (recommended: high-quality images)
- You know your target output platform (YouTube, TikTok, Instagram, etc.)
You can change aspect ratio anytime (before or after generating), so you don’t have to decide up front.
Create a New Project
Step 1: Open the Create Project Flow
From the dashboard, click Create Project.
Step 2: Enter Basic Project Info
Provide a clear project name so it is easy to find later. Recommended naming format:
ClientName - Campaign - Version- Example:
Acme - Spring Launch - V1
Step 3: Save and Open Editor
Save to enter the project editor, where all content and generation settings (including aspect ratio) are managed. You can change these anytime inside the project.
Edit an Existing Project
Open a project from your project list to continue editing. You can edit media and settings at any time—before or after generating. After you generate, you can still change music, text, scene order, or aspect ratio, then regenerate when you’re ready.
Upload Images
Use the image/media upload area in the editor to add files.
Best practices:
- Upload images in the order you want scenes to appear
- Use consistent image quality for smoother visual flow
- Avoid low-resolution assets when possible
Common actions:
- Add one or multiple images
- Reorder images to change scene sequence
- Replace an image without rebuilding the entire project
- Remove images you no longer need
Upload Images from Zillow via URL
You can also import listing images directly from Zillow using a URL.
- Copy the Zillow listing URL you want to use
- In the project editor, choose the Zillow URL/image import option
- Paste the URL and start the import
- Review imported images and remove any you do not want
- Reorder images to match your preferred video flow
Tips: Use the full Zillow listing URL (not a shortened link), remove duplicate or low-priority images so the final video stays focused, and you can reorder or change images anytime—including after a first generate.
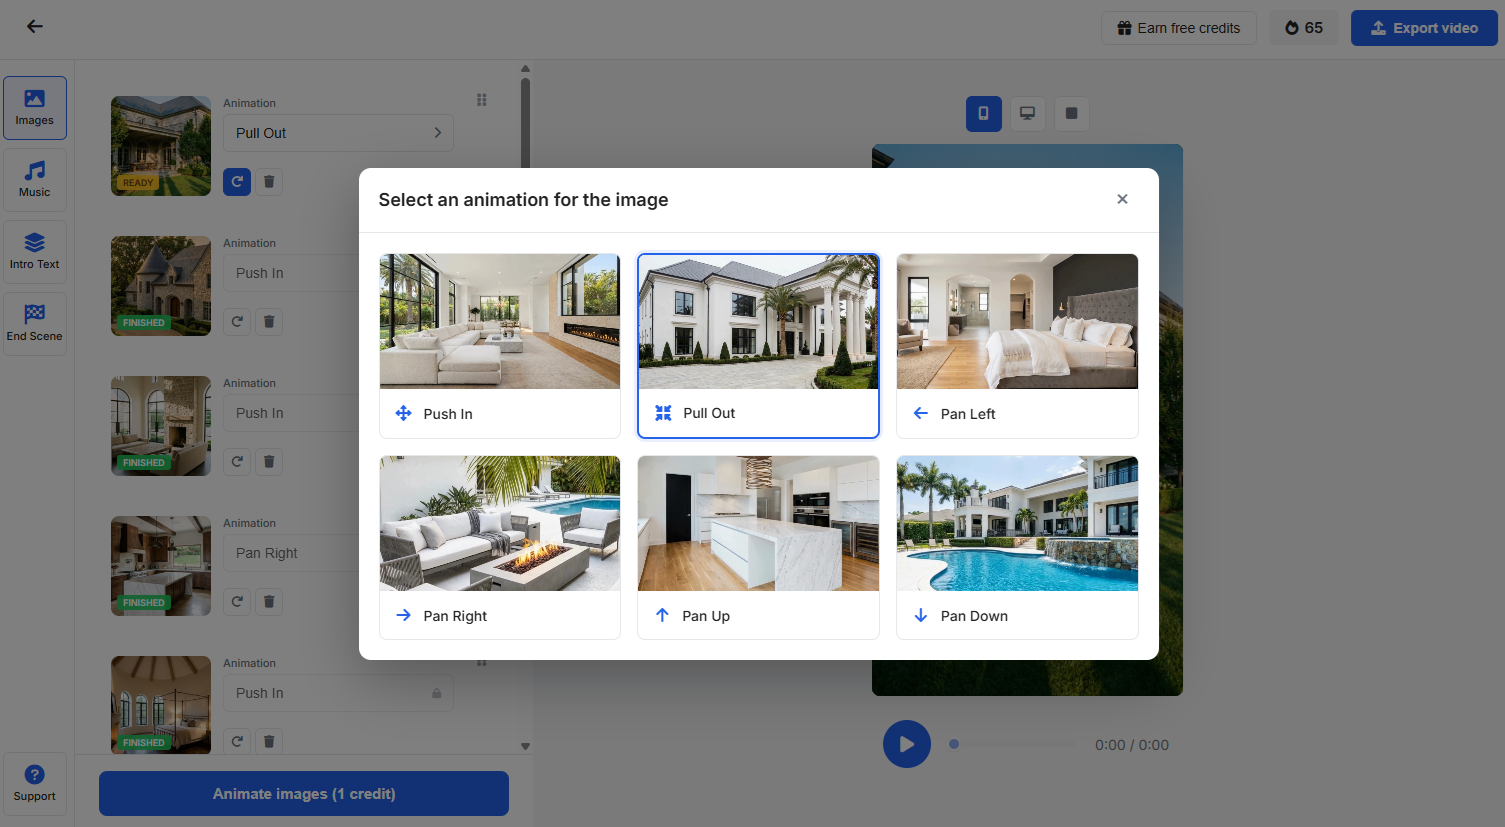
Animating a Scene
For each image (scene), you choose a camera motion—how the scene will animate in the video. Options include Push In, Pull Out, Pan Left, Pan Right, Pan Up, and Pan Down. This must be selected before the scene is generated. By default the system is set to Auto: if you don’t select a motion, the system will choose one for you.
Manage Scene Order and Flow
Scene order has a major impact on pacing and story clarity. A typical flow: intro images first, core content in the middle, call-to-action/end frame last. You can reorder scenes anytime—before your first generate or after. If the flow feels abrupt in preview, reorder and regenerate.
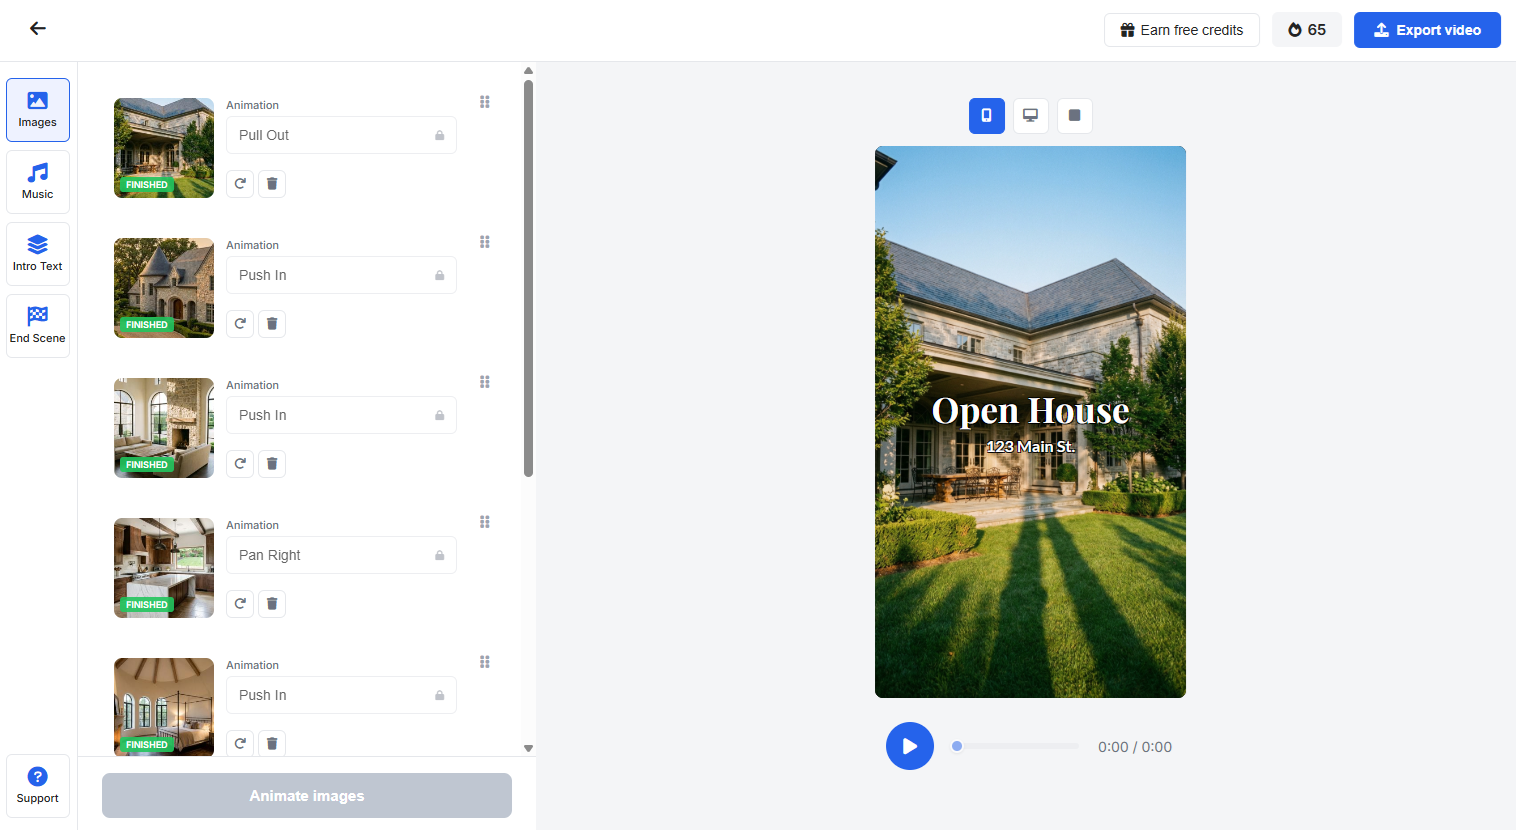
Choose Animation for Each Scene
After you upload an image, it becomes a scene. Each scene shows a status: READY (not yet generated) or FINISHED (already generated). For each scene you can select an animation style (e.g. Push In, Pull Out, Pan Left, Pan Right, Pan Up, Pan Down) or use Auto to let the system choose.

If you’re unhappy with a scene after it’s generated, you can click the Regenerate button for that scene. You can also select a different animation or motion first if you want—then regenerate. It costs 1 credit per scene to generate or regenerate. The total credit cost for the current action is shown on the blue Animate images button.
Important: Pick the animation you want before generating (or before regenerating that scene). If you change the animation for a scene later and regenerate, that scene is re-created by the AI from scratch and costs an additional credit. So choosing the right animation the first time helps avoid extra credit use.
Add and Edit Text
Use the text controls to add overlays, titles, or scene captions. Typical text edits include main headline/title, subheading or supporting text, and scene-specific labels.
Recommended text guidelines: Keep lines short and readable on mobile, use high contrast against image backgrounds, maintain consistent style across scenes. You can add or edit text anytime, including after generating. If text appears cut off after ratio changes, recheck size and placement and regenerate.
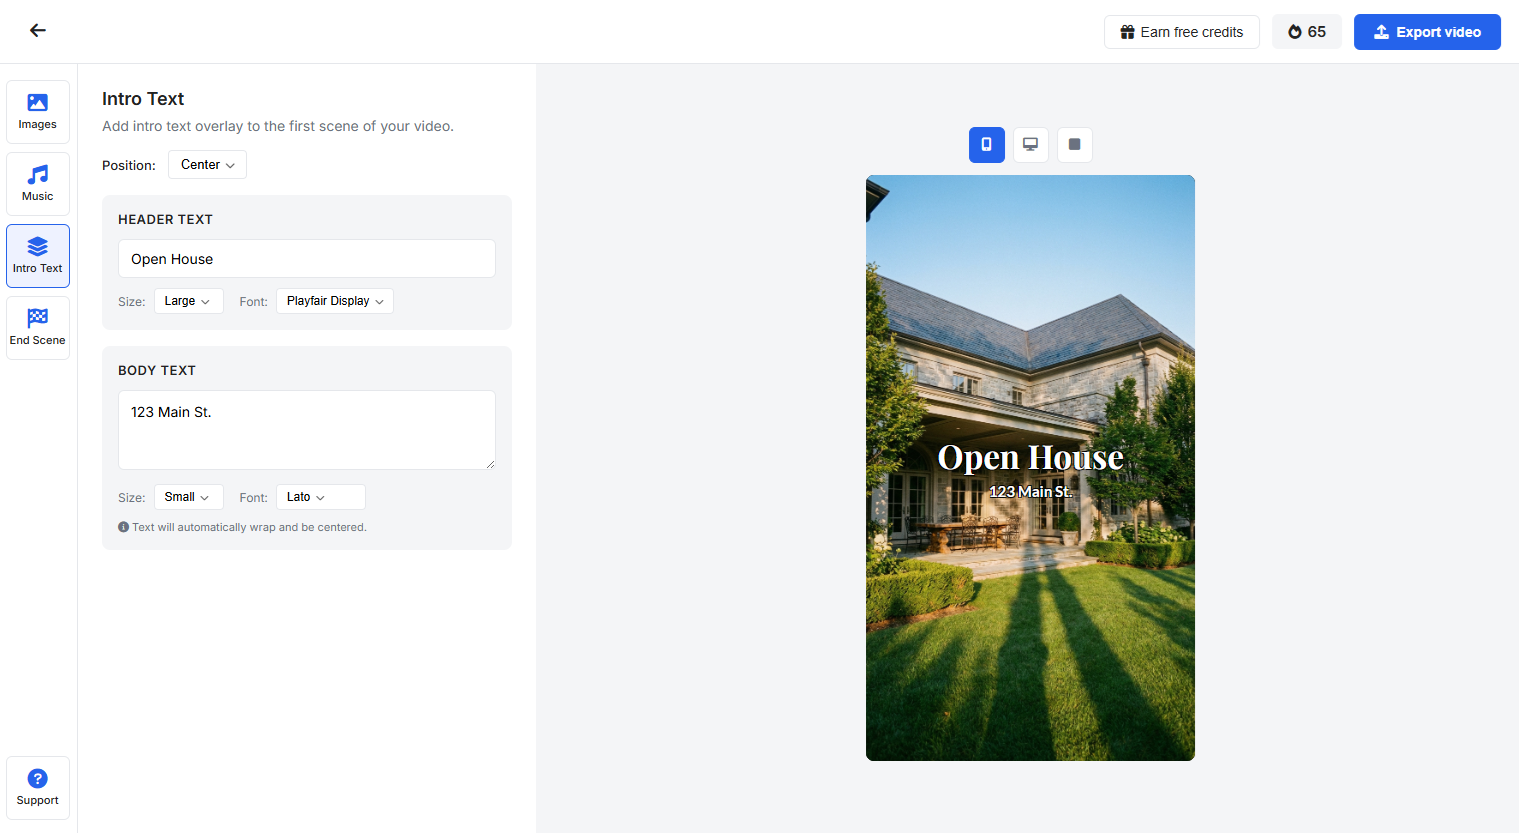
Intro Text
The Intro Text page lets you add a text overlay on the first scene of your video. You can enter header text (e.g. “Open House”) and body text (e.g. address or tagline). For each you can choose position (e.g. center), size (e.g. large, small), and font. Text wraps and is centered automatically. You can change intro text at any time—no additional credits (credits are only for scene video generation). Intro text is a free edit.
End Scene
The End Scene page lets you add a closing scene with your branding at the end of the video (after the last video scene). You must enable it (e.g. “Enable closing scene” checkbox) for it to appear. You can upload a logo or icon, enter header text and sub text (body), and set size and font for each. Text wraps automatically. You can change the end scene—enable/disable, logo, header, sub text, size, font—at any time at no additional credit charge. End scene is a free edit.
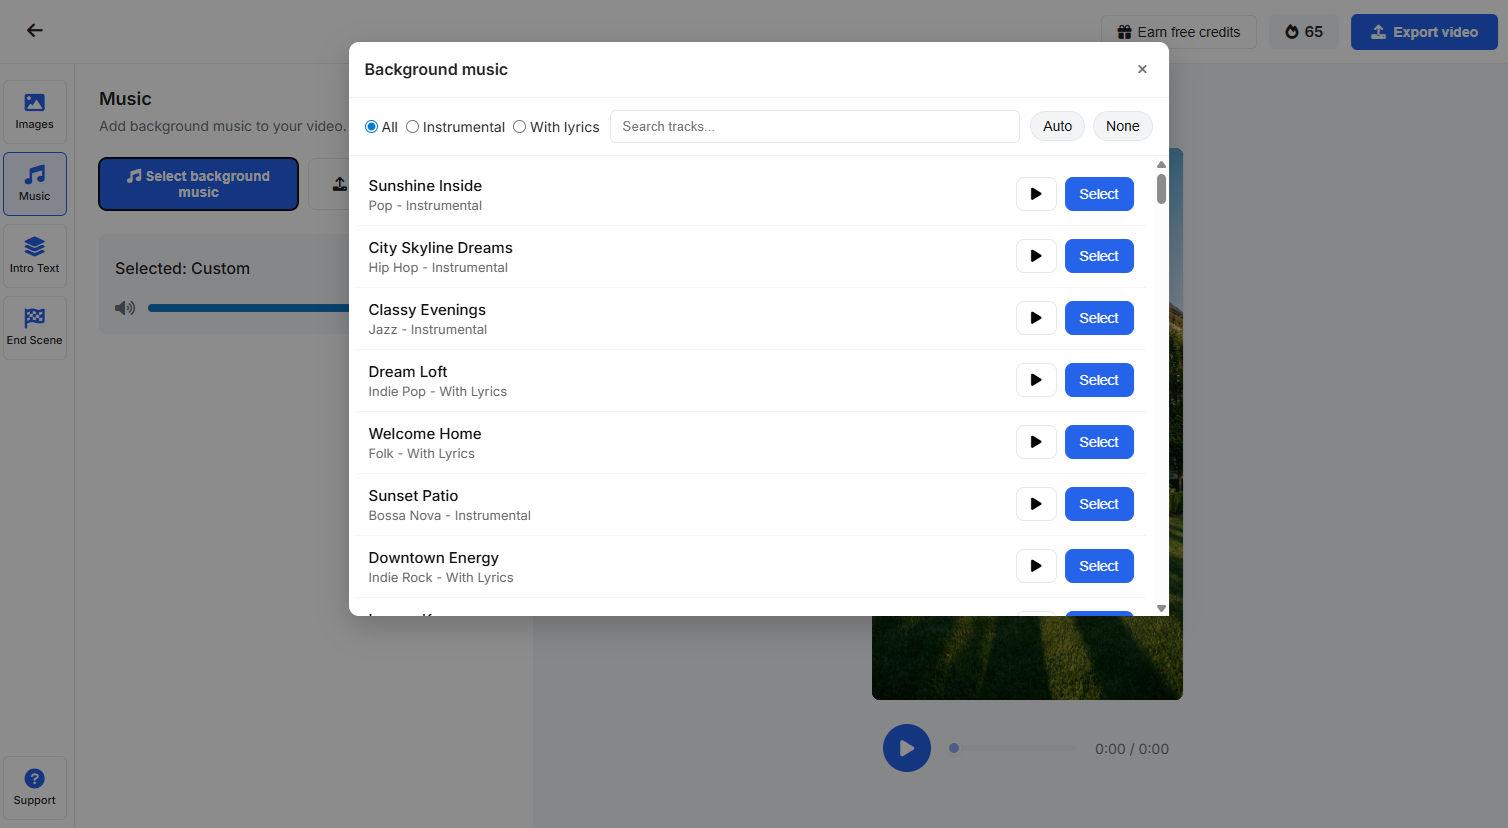
Add or Change Music
Open the music/audio section to configure background audio. You can typically choose from available tracks, upload your own music, replace or change the track anytime (before or after generating), or remove music for silent output.
Quality tips: Match music tone to brand style and pacing; avoid overpowering tracks if spoken content is present; re-preview after changing audio to verify timing and mood.
Change Aspect Ratio
Aspect ratio controls where your video is best displayed. Common formats:
- 16:9 for YouTube and widescreen playback
- 9:16 for TikTok, Reels, and Shorts
- 1:1 for square social placements
You can change aspect ratio before or after generating. When ratio changes, text and framing can shift—review in preview and adjust if needed; intro and end scene text are free to edit.
Generate Video Output
When you’re ready, click Generate. You don’t have to perfect every edit first—you can generate, preview, then change music, text, scene order, or aspect ratio and regenerate if you want.
How it works: Credits and generation are per scene (per image). It costs 1 credit per scene to generate or regenerate. The total credit cost is shown on the blue Animate images button before you run generation. Each scene is generated (with its chosen animation), then AgentPulse combines all scenes in order into the final video using your project settings—music, scene order, text, aspect ratio, etc.
During generation:
- Each scene is processed according to its animation and content
- Credits are deducted based on how many scenes are generated
- The system assembles the final video from the generated scenes
- A generated output becomes available for preview/download after processing
Generation time may vary based on workload and project complexity.
Credit System (How Billing Usage Works)
AgentPulse uses a credit-based system for generation. Credits are consumed per scene (per image)—1 credit per scene to generate or regenerate. The total credit cost for your current generation is shown on the blue Animate images button. Each scene is generated with its animation; the system then combines all scenes into the final video using your settings (music, scene order, text, aspect ratio, etc.).
Key Credit Rules
- 1 credit per scene to generate or regenerate (always scene by scene—there is no “regenerate full video”)
- Generating a scene consumes credits for that scene
- Re-generating a scene (e.g. after changing its animation) consumes 1 credit for that scene again—the scene is regenerated by the AI from scratch
- Project-level edits (music, text, scene order, aspect ratio) are free and do not regenerate any scenes or use credits
- Insufficient credits prevent generation
- Credit usage depends on how many scenes you generate or regenerate
What Is Free vs What Costs Credits
In the project editor, only video generation actions consume credits.
Costs credits:
- Generate a scene (1 credit per scene)
- Regenerate a scene (e.g. after changing its animation)—that scene costs 1 credit again
Free (no credits charged):
- Changing text content or style
- Intro text (header, body, position, size, font on first scene)
- End scene (enable/disable, logo, header, sub text, size, font)
- Uploading, replacing, removing, or reordering images
- Importing images from Zillow URL
- Changing music/audio
- Changing aspect ratio
- Updating other project settings (before or after generation)
- Previewing completed outputs
- Downloading completed outputs
A practical rule: project-level edits (music, text, order, aspect ratio) are free anytime. Credits are only used when you generate or regenerate individual scenes.
How to Avoid Credit Waste
Credits are used only when you generate or regenerate a scene (1 credit per scene). Changing music, text, order, or aspect ratio is free and does not regenerate any scenes. If you change a scene’s animation or want to redo a scene, regenerating that scene costs 1 credit.
Preview Your Video
After generation completes, open the preview player before downloading.
Run a quick quality checklist:
- Scene order is correct
- Transitions feel natural
- Text is readable and correctly positioned
- Music timing and volume feel right
- No obvious cropping or framing issues
If anything is off, edit in the editor—music, text, scene order, and aspect ratio are free. To redo a specific scene (e.g. different animation), use the regenerate option for that scene and generate again (1 credit for that scene).
Download Final Video
Once preview looks correct:
- Click Download
- Select available output format/quality options (if shown)
- Save the file locally
After download, open the file and confirm playback quality on your target platform before publishing.
Recommended End-to-End Workflow
One way to work (you can vary the order):
- Create project
- Upload images
- Add text and music, set aspect ratio (you can change any of these later)
- Generate
- Preview
- If you want changes: project-level edits (music, text, order, aspect ratio) are free. To redo a specific scene, use the regenerate option for that scene and generate again (1 credit).
- Download
- Publish
Troubleshooting
Generation Does Not Start
Possible causes: Not enough credits, missing required project content, temporary UI/session issue.
Try this: Confirm credit balance; verify required media/text fields are completed; refresh and retry generation.
Output Looks Wrong
Possible causes: Scene order mismatch, text placement after aspect ratio change, music timing mismatch.
Try this: Recheck scene order (reordering is free); review text positions and style; confirm ratio is correct for platform; if a specific scene looks wrong, regenerate that scene (1 credit) instead of editing project-level settings.
Download Is Unavailable or Fails
Possible causes: Generation not fully complete, temporary network/browser issue, incomplete output state.
Try this: Wait until generation status is complete; refresh project page; retry download; regenerate the affected scene(s) if needed.
Publishing and Quality Tips
For best production outcomes:
- Keep branding consistent (fonts, tone, colors)
- Use source images with similar style and resolution
- Review on both desktop and mobile if distributing broadly
- Keep a versioned project naming pattern for collaboration
- Save stable versions before major edits
FAQ
How do I upload my video to MLS?
Most MLS systems expect a publicly accessible streaming link instead of a direct uploaded video file. Recommended workflow: (1) Generate and download your video from AgentPulse; (2) Upload the video to your YouTube channel (or another streaming/video host accepted by your MLS); (3) Copy the public video URL; (4) Paste that link into the MLS virtual tour/video link field. If your MLS has specific link rules, follow your MLS board requirements first.
Do edits cost credits?
No. Music, text, scene order, and aspect ratio are free to change anytime. Credits are only used when you generate or regenerate a scene.
Can I change text, music, and aspect ratio without paying credits?
Yes. All of those edits are free. You are charged only when you generate or regenerate a scene.
What if I change settings after generating once?
Other edits (music, text, scene order, aspect ratio) are free—change them anytime. If you want to re-animate a scene that's already completed, turn on the regenerate option for that scene and click generate again; that costs 1 credit for that scene. You can also add completely new scenes anytime; new scenes cost credits to generate since they are new.
Can I import photos from Zillow instead of uploading files one by one?
Yes. Use the Zillow URL import flow in the editor and then review/reorder imported images.
Does changing a scene’s animation cost credits?
Yes. If you turn on the regenerate option for that scene and generate again, that scene is re-created by the AI from scratch and costs 1 credit. Choosing the animation you want before the first generate helps avoid extra credit use.
Why does my text move after I switch aspect ratio?
Different aspect ratios change the canvas layout. You can change aspect ratio before or after generating. After a ratio change, review text placement in preview and adjust if needed; intro and end scene text are free to edit.
Why is Generate disabled?
Common reasons: not enough credits, missing required project media/settings, or temporary session or page state issue. Refresh the page, verify inputs, and try again.
Can I download and reuse my video outside AgentPulse?
Yes. After generation, download your file and publish it on supported platforms.
Support Information
If you need help from your internal team or support contact, include:
- Project name
- Approximate generation time
- Brief issue description
- Screenshot of any visible error
This information helps speed up troubleshooting and resolution. Contact support for assistance.