
A walk through real estate video is essentially a marketing powerhouse crafted from your existing property photos. It's far more than a simple slideshow. By using smart, cinematic motion effects like subtle pans and zooms, we can create the feeling of an actual tour, guiding potential buyers through the home's layout and showcasing its natural flow. This technique transforms a static photo gallery into an experience that feels alive and engaging.
Why Video Tours Are a Must-Have for Real Estate Agents
In a market this crowded, a gallery of beautiful photos just isn't enough to cut through the noise anymore. Today’s buyers have high expectations. They want to feel the space, understand the layout, and start forming an emotional connection long before they schedule a showing. This is exactly where a well-made walk through real estate video shines.
It really comes down to storytelling. A video can capture a home’s unique character and atmosphere in a way that still images simply can't match. You’re not just displaying rooms; you're taking a prospective buyer on a personal journey, helping them truly envision what their life could be like there.
The Data Behind Video's Dominance
This shift isn't just a hunch; the numbers tell a powerful story. Industry surveys have found that 58% of homebuyers now expect to see a video of a property they're seriously considering.
Even more impressive? Listings that include a video tour receive an incredible 403% more inquiries than those that don't. That single statistic makes it clear how video can draw in a much larger, more interested audience. For a deeper dive, you can explore more real estate video statistics and see how they're reshaping marketing strategies.
This huge jump in engagement also leads to much better leads. When a buyer has already watched a video tour, they walk into a showing with a solid understanding of the property. This pre-qualification process is invaluable—it saves you time and lets you focus your energy on people who are genuinely serious.
By providing an immersive preview, you filter out casual browsers and attract serious contenders who are already sold on the home’s layout and feel.
The performance gap between listings with and without video is too significant to ignore.
How Video Transforms Real Estate Listing Performance
| Performance Metric | Listings Without Video | Listings With Video |
|---|---|---|
| Buyer Inquiries | Baseline | +403% |
| Buyer Expectation | Often overlooked | Met for 58% of buyers |
| Lead Quality | Mixed (serious & casual) | Higher pre-qualified interest |
| Online Reach | Limited by photo algorithms | Boosted by video algorithms |
Ultimately, adding video isn't just a small upgrade; it's a fundamental change in how your listing performs online.
Key Advantages for Agents
Making video a core part of your marketing strategy gives you a serious competitive edge. It’s not just about keeping up with trends; it’s about driving real results for your business and your clients.
- Elevated Property Showcase: A video presents the property in its absolute best light, highlighting the crucial flow between rooms and emphasizing the most appealing features in a dynamic way.
- Increased Online Visibility: It’s no secret that platforms like YouTube and social media algorithms are hungry for video. Using it gives your listings significantly greater reach and exposure.
- Stronger Personal Branding: When you consistently use high-quality video tours, you build a reputation as a modern, tech-forward agent who invests in top-tier marketing to get the best results for clients.
Building Your Video Storyboard from Existing Photos
Before you even think about opening your video editor, you need a plan. This is where the magic really happens. You're not just an agent with a folder of photos; you're a director. Your job is to arrange those static images into a story that pulls a buyer through the home, making them feel like they're actually there.
This planning phase—essentially creating a storyboard—is what separates a slick, professional video from a clunky slideshow. Nail this, and the editing process becomes a thousand times easier.
Curation: The Art of Selecting the Right Shots
First things first, you have to be a tough critic. Not every photo from the listing gallery deserves a spot in the video. You’re looking for the best of the best that, together, tell a compelling story.
Start by sorting your photos by room or area—exterior, entryway, living room, kitchen, main bedroom, you get the idea. For each space, pick only your strongest shots. Look for images with great light, clean compositions, and a strong sense of what that room is all about. It’s always about quality, not quantity. If you want to level up your source material from the start, digging into some pro real estate photography tips will give you a much stronger foundation to build on.
- Wide Shots: Think of these as your establishing shots. They give viewers a sense of the room's size and layout.
- Medium Shots: These pull the viewer in closer, focusing on a key area like the kitchen island or a cozy fireplace nook.
- Detail Shots: Use these like a secret weapon. A quick shot of a high-end faucet, a unique light fixture, or custom millwork can scream luxury.
Sequencing for a Natural Flow
Okay, you’ve got your curated photos. Now, you need to put them in the right order. The sequence is everything; it’s the virtual path a potential buyer will follow. The goal is to make it feel just like a real-life walkthrough.
A sequence that just plain works for a walk through real estate video usually follows this path:
- The Hook (Exterior): Lead with your absolute best exterior "hero" shot. A stunning twilight photo or a bright, welcoming shot of the front of the home works perfectly. You have to grab them from the very first frame.
- The Grand Entrance (Entryway & Living): Now, bring them inside. Move from the front door to the entryway, then flow right into the main living area. This transition immediately helps them understand the home's layout.
- The Heart of the Home (Kitchen & Dining): From the living room, pivot to the kitchen and dining areas. For most buyers, these are the make-or-break spaces.
- The Private Quarters (Bedrooms & Bathrooms): Next up, guide viewers to the primary suite, then show the other bedrooms and bathrooms.
- The Bonus Features (Specialty Rooms & Outdoors): Got a cool home office, a finished basement, or an awesome backyard patio? This is where you show off those unique selling points.
- The Lasting Impression (Final Shot): End on a high note. A gorgeous view from the back deck, a final sweeping shot of the living room, or another incredible exterior photo will leave a lasting impact.
This logical flow helps viewers build a mental map of the property. It makes the home feel familiar and inviting long before they ever book a showing. You’re not just showing pictures; you’re giving a persuasive tour.
Bringing Still Photos to Life with Cinematic Motion
Okay, you've got your shots picked out and the sequence planned. Now for the fun part: making those still photos move. This is where you transform a simple slideshow into a dynamic, engaging video tour that feels like you're actually walking through the home.
The secret isn't over-the-top, dizzying effects. Think slow, smooth, and intentional. The motion you add should feel like a camera gliding through the space, gently guiding the buyer’s eye to what matters most. It’s what makes a video feel professional and polished.
This diagram breaks down the logical flow your video should follow—starting outside, moving through the main living areas, and zeroing in on the details that make the property special.
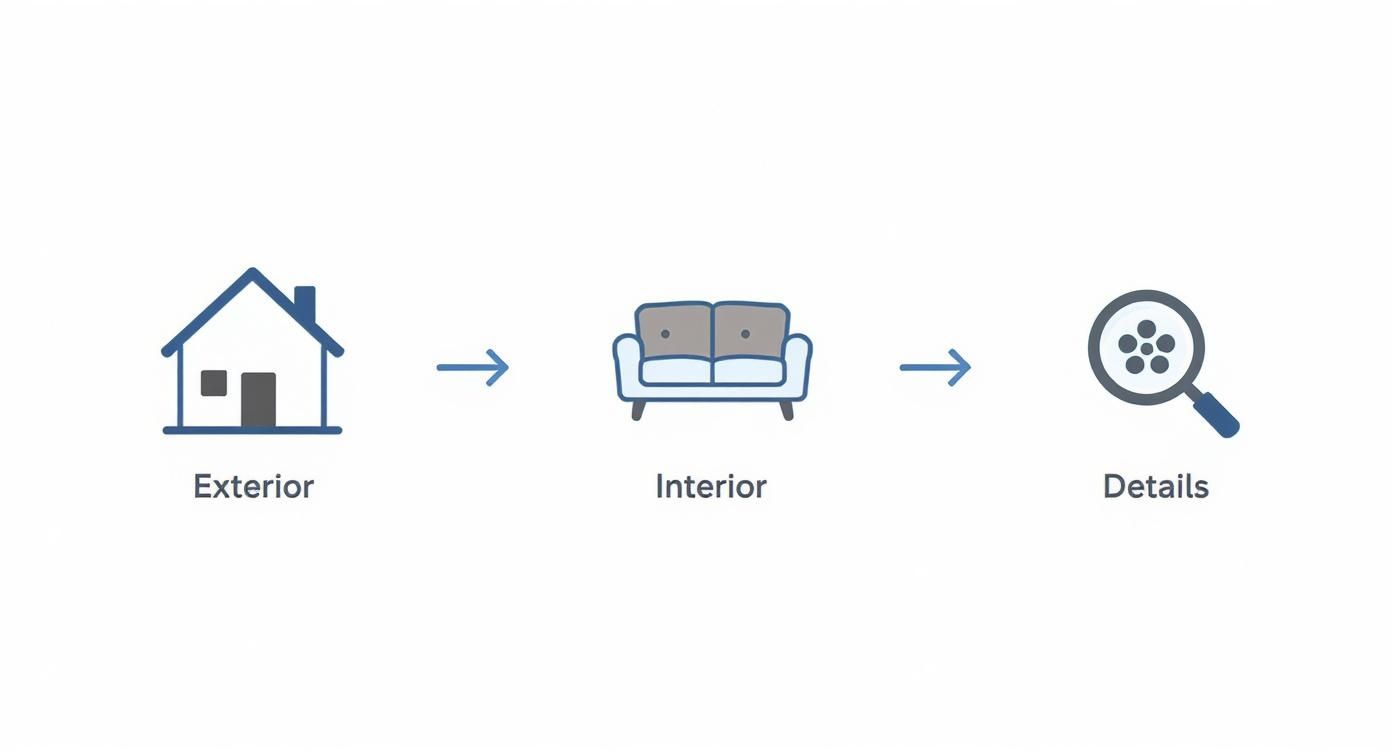
Following this path helps viewers build a mental map of the layout, just like they would during an in-person showing.
Choosing the Right Motion for Each Shot
Every bit of movement needs to have a purpose. Before you apply an effect, ask yourself: what am I trying to show off in this picture? The right motion will emphasize the home's best features, not distract from them.
Here’s a quick guide to the essential motion effects I use all the time. They’re simple, but when used correctly, they make a huge difference in the final product.
| Essential Motion Effects for Real Estate Photos |
| :--- | :--- | :--- |
| Motion Effect | What It Does | Best Used For |
| Slow Pan (Left to Right) | Gently sweeps across the frame horizontally. | Showing the scale of wide spaces like a living room, backyard, or a long kitchen countertop. |
| Gentle Zoom-In | Subtly pushes into a specific part of the image. | Drawing attention to a key detail: a fireplace, a luxury appliance, or custom tilework. |
| Slow Zoom-Out | Gradually pulls back to reveal more of the scene. | Creating a sense of grandeur or context, like starting on a breakfast nook and revealing the entire open-plan kitchen. |
These three moves are really all you need to create a high-quality video tour.
Most modern real estate video editing software makes adding these effects incredibly simple, often with just a few clicks. You don't need to be a Hollywood editor to get great results.
Timing and Transitions: The Keys to a Seamless Flow
Pacing is everything. If your shots fly by too quickly, viewers will feel rushed. If they linger too long, you’ll lose their attention. I've found the sweet spot is keeping each photo on screen for about 4 to 6 seconds.
This gives the motion enough time to feel smooth and lets the viewer take in the room. For a truly show-stopping "hero" shot—like that killer kitchen or the master suite—you can stretch it to 7 seconds, but I wouldn’t go much longer than that.
The real magic is in the transitions. Your goal is for the viewer to barely notice them. The entire video should feel like one continuous, fluid experience.
This means you need to avoid all those flashy, distracting transitions like star wipes or page curls. They just scream amateur hour.
Stick with a simple cross-dissolve. It gently fades one shot into the next, creating a soft, almost dreamlike effect that keeps the focus right where it belongs: on the property. It’s the industry standard for a reason—it’s clean, professional, and it just works.
Adding Professional Polish with Sound and Branding
You've got the visual sequence down and the motion effects are looking smooth. The video is really starting to take shape. But without sound, even the best-looking walk through real estate video feels a little empty and can struggle to hold a viewer's attention. The final layers of polish—the right soundtrack and some clean branding—are what will turn this project from a simple slideshow into a compelling marketing piece.
Honestly, these last few touches are what make all the difference. They create a memorable experience that doesn't just show off the home but also reminds people of the professional who brought it to them.
Selecting the Perfect Soundtrack
Music is the soul of your video. It sets the emotional tone, dictates the pace, and can make a home feel either exciting and modern or cozy and luxurious. The goal is always to pick music that matches the property’s personality.
One big rule: never, ever use popular, copyrighted music you'd hear on the radio. This is the fastest way to get your video flagged or even taken down from platforms like YouTube. Always stick to royalty-free music libraries.
Here are a few scenarios to get you thinking:
- For a modern condo with city views: I'd look for an upbeat, optimistic instrumental with a light electronic beat.
- For a classic family home in the suburbs: A gentle acoustic track with piano or guitar always creates a warm, inviting vibe.
- For a high-end luxury property: Think elegant and sophisticated. A subtle orchestral piece or a minimalist classical track works wonders.
The rise of video tours like this is no accident. Short-form video is a powerhouse for grabbing attention on social media, where videos generate an incredible 1200% more shares than images and text combined. This makes them a must-have for getting your brand and listings seen. You can dive deeper into the impact of video marketing statistics to see just how much it's shaping real estate strategy.
The key is to keep the music in the background. It’s there to support the visuals, not overpower them. I always set the volume just high enough to create ambiance without distracting from the home itself.
Integrating Clean and Clear Branding
Every video you create is a direct reflection of your brand. You want to weave in your identity, but it has to be done tastefully so it reinforces who you are without getting in the way of the property.
Start with a simple intro card. Keep it short and sweet—about three to five seconds is all you need. It should include the essentials:
- Your logo or headshot
- Your name and brokerage
- The property address
Throughout the video itself, you can use subtle text overlays (often called lower thirds) to point out key details. Use them sparingly to highlight specific features like "Newly Renovated Kitchen" or "Private Backyard Oasis." Always use a font that is clean, modern, and easy to read.
Finally, end your video with a strong call to action. The last five seconds should be a dedicated outro card that tells interested buyers exactly what to do next. It must include:
- Your full name
- Your phone number
- Your email address
- Your website URL
This final screen makes it incredibly easy for viewers to reach out the moment they feel inspired, turning that flicker of interest into a real lead.
How to Export and Share Your Video for Maximum Impact
https://www.youtube.com/embed/g9_VwacuNU8
You’ve done the hard work—your walkthrough video is polished and ready to go. Now comes the part that actually gets the property sold: getting that video in front of the right people. A brilliant video no one sees is just a creative exercise, so a smart sharing plan is just as critical as the editing itself.
This isn’t about just spraying your video across the internet. It's about tailoring it for each platform to make sure it looks sharp, plays smoothly, and actually generates leads for your listing. Let's turn your video into a serious business driver.
Mastering Your Export Settings
Every platform has its own quirks and technical specs. If you use a one-size-fits-all export, your video might end up looking blurry, pixelated, or awkwardly cropped. To look like a pro, you need to export the right file for the right channel.
Here are my go-to settings for the platforms that matter most in real estate:
- For the MLS and YouTube: Go with 1080p (1920x1080 pixels). This is the gold standard for high-definition video, offering a perfect blend of crisp quality and a manageable file size. Stick to the standard horizontal (16:9) aspect ratio.
- For Instagram Reels and TikTok: These platforms are all about vertical video. You'll need to export a version in 1080x1920 pixels (a 9:16 ratio). This format fills the entire phone screen, which is essential for stopping the scroll.
- For Facebook and Instagram Feeds: In the main feed, a square (1080x1080 pixels) or a slightly taller 4:5 ratio tends to work best. Why? It simply takes up more screen real estate than a wide video, making it harder to ignore.
Pro Tip: No matter the platform, always choose the H.264 (or MP4) codec. It’s the universal language of web video, keeping your files small for fast uploads and smooth playback without trashing the quality.
Crafting a Winning Promotional Strategy
With your perfectly formatted video files in hand, it’s time to get strategic. The goal isn't just views; it's to generate showings and offers.
First stop: YouTube. Upload the 16:9 version and treat it like the search engine it is. Your title should be the full property address plus a hook, like "Luxury Waterfront Home for Sale | 123 Bayview Dr, Sarasota, FL." The description is your mini sales pitch—write a compelling summary, add your contact info, and, most importantly, include a link straight to the official listing on your website.
Next, it’s time for social media. Post your videos when your audience is actually online. Don't just guess; check your platform analytics to find those peak engagement times. For a complete playbook, our guide on real estate video marketing dives deep into building a full-funnel strategy.
Finally, embed the YouTube video directly on the property's dedicated page on your website. This is a game-changer. It keeps potential buyers engaged on your turf, dramatically increasing the odds they’ll reach out to you instead of clicking away to another listing on Zillow. This simple move transforms your video from a passive ad into an active lead-generation machine.
Questions That Pop Up When Making Videos from Photos
Even with the best plan, you're bound to hit a few snags when turning still photos into a video that flows. Let's tackle some of the most common questions agents and photographers ask. Think of this as your quick-start troubleshooting guide.
What's the Best Software to Use?
If you're just dipping your toes in, you don't need a complicated, expensive program. Tools like Canva, iMovie, or even Microsoft Clipchamp are fantastic starting points. They're mostly free and designed to be intuitive, so you can add motion and transitions without a massive headache.
Ready for more creative firepower? Industry-standard software like Adobe Premiere Pro or DaVinci Resolve will give you limitless control. Honestly, the "best" tool is the one that fits your budget, your tech comfort level, and the professional look you're aiming for.
How Long Should My Real Estate Video Be?
The sweet spot for a property walkthrough video is between 90 seconds and 3 minutes. That's just enough time to hit all the highlights and create a sense of flow without your viewers getting distracted and clicking away.
For social media, you have to think differently. A TikTok or Instagram Reel needs to be much punchier—aim for under 60 seconds. It’s all about grabbing attention fast with your absolute best shots.
I see this mistake all the time: agents make their videos way too long. Your goal isn't to document every square inch of the house. It's to spark an emotional connection and get them to book a showing. Keep it tight and impactful.
Can I Use Vertical Photos in My Video?
You definitely can, but you have to be smart about it. If you just drop a vertical photo into a standard horizontal (16:9) video, you'll get those ugly black bars on the sides. It just screams "amateur."
Here’s a simple pro trick:
- Place your vertical photo on the timeline.
- Duplicate it and put the copy on a layer behind the original.
- Scale up the background copy so it fills the entire screen.
- Add a blur effect to that background layer.
This creates a polished, seamless look that makes your vertical shot the hero while filling the frame beautifully.
Where Can I Find Legal Music for My Video?
This is a big one. Grabbing a popular song off the radio is a surefire way to get your video flagged or taken down from YouTube and Facebook for copyright infringement. You absolutely have to use music you have the rights to.
Luckily, you have great options. The YouTube Audio Library is an incredible free resource with tons of tracks. If you want a more curated, high-quality selection, a paid subscription to a service like Epidemic Sound or Artlist is well worth the investment. They make it incredibly easy to find the perfect vibe for your property.
Ready to create stunning videos in minutes, not hours? AgentPulse uses AI to automatically transform your listing photos into cinematic, engaging video tours.
Learn more and get started for free at AgentPulse.ai